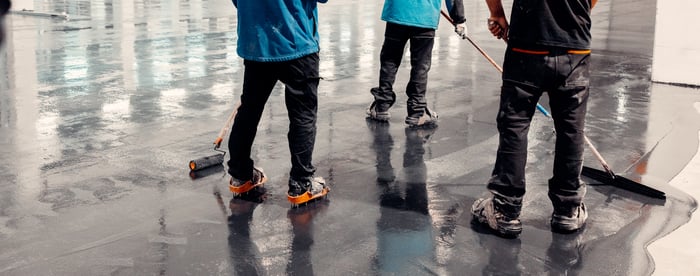
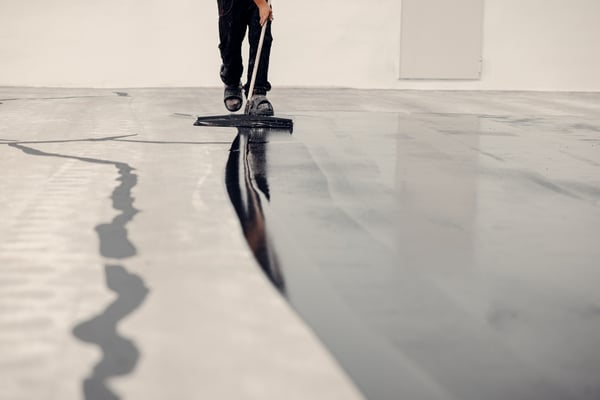
Applying epoxy coatings to floors requires more than just a simple cleaning; it demands precise, dedicated preparation to ensure a durable, high-quality result. Polishing the concrete floor before applying epoxy is important in achieving a resilient, smooth surface that’s built to last.
In this guide, we’ll walk you through the entire process of polishing your floor for epoxy application, finding the benefits, techniques, and important steps that lead to a professional finish.
Importance of Floor Polishing for Epoxy
Epoxy coatings are widely appreciated for their strength, durability, and aesthetic appeal. They create a glossy, resilient surface ideal for various environments, from residential garages and basements to commercial warehouses, hospitals, and retail spaces.
However, epoxy requires a meticulously prepared base to bond effectively. This is where concrete polishing becomes important. Polishing the concrete surface before applying epoxy removes imperfections, smooths the surface, and improves the epoxy's adhesion. This is important because an unpolished or uneven surface may lead to several post-application problems, including bubbling, peeling, cracking, or uneven textures.
By removing contaminants, minor cracks, and any residues from previous floor coatings with floor polishing you can create a solid foundation that enables epoxy to form a cohesive bond with the concrete. A solid bond is crucial for long-term durability and aesthetic integrity.
Polishing Concrete Before Epoxy Application
The polishing process is particularly important in high-traffic areas where flooring endures continuous wear and tear. Furthermore, a polished surface extends the lifespan of the epoxy, reducing the frequency of touch-ups and minimizing maintenance costs over time.
Beyond adhesion and durability, polished concrete also contributes to the ease of cleaning. When applied over a smooth, polished surface, epoxy tends to hold up better against common wear factors like stains and scratches. As a result, these floors are typically easier to maintain, saving time and effort in upkeep.
Additionally, the visual quality of the epoxy finish is increased by the polished surface. Polishing helps to create a smooth, even texture that works harmoniously with epoxy’s natural shine, contributing to the finished product’s overall aesthetic appeal.
Understanding the critical role of surface preparation, let's delve into the precise process of concrete floor polishing. The following comprehensive guide will walk you through each essential step, ensuring that your concrete surface is meticulously prepared to receive an epoxy coating that is not just visually stunning, but also durable and long-lasting.

1. Preparing the Workspace
Proper workspace preparation is important to guarantee an efficient polishing process. The area must be cleared of any obstructions, including furniture, equipment, and other items. Once cleared, it’s best to assess the floor’s condition to identify any potential issues or areas requiring extra attention.
To maintain an organized workflow, it is important to divide larger spaces into sections. This is especially important in industrial or commercial spaces where precision coverage is needed.
Inspecting the floor carefully at this stage is important for identifying cracks, spalling, or areas with stains that may require additional treatment. While minor imperfections can be addressed during the polishing process, significant issues, such as large cracks or spalled areas, might need repair before you begin.
Professionals often turn to specialized repair solutions like those from ArmorPoxy to simplify surface preparation. Their Crack Repair Putty works perfectly for filling and smoothing out deep cracks, while the ArmorPatch Concrete Repair Kit proves ideal for addressing larger damaged areas. Using high-quality concrete patching materials ensures a level and uniform surface, improving the effectiveness of the subsequent polishing and epoxy application steps.
2. Selecting the Right Equipment for Polishing
Polishing concrete for an epoxy application requires specific equipment, and the choice of tools can impact the efficiency and quality of the final product. The primary tool for this process is a concrete floor grinder equipped with diamond tooling.
Diamond tooling is available in various grit levels, with each grit performing a distinct function in the polishing process. Lower-grit diamonds, typically in the 20-40 grit range, are ideal for initial grinding and leveling, while higher-grit diamonds, such as 150 or 200 grit, are suitable for finishing.
For smaller areas, a single or dual-head grinder may suffice, but larger spaces will benefit from a planetary grinder, which has multiple heads that rotate independently, providing a smoother, more consistent finish.
Besides the grinder, you may also need a hand polisher for reaching corners and other tight spaces that larger machines can’t access. Hand polishers allow for greater precision and are important for achieving consistent polish in smaller areas.
3. Grinding the Concrete Floor
Concrete grinding is the preliminary stage of floor polishing, where the goal is to create a level, smooth surface by removing any imperfections, contaminants, or previous coatings. The grinding process typically involves three main stages: coarse grinding, medium grinding, and fine grinding, each providing a progressively smoother finish.
During the coarse grinding stage, a low-grit diamond (20-40 grit) is used to break down large imperfections and strip away any existing sealants or previous coatings. This stage is important to ensure that any contaminants embedded in the concrete are removed, creating a fresh surface layer. Coarse grinding also helps address minor cracks, removing rough edges and preparing the floor for subsequent refinements.
After completing the coarse grinding pass, move on to medium grinding using a 60-80 grit diamond tool. This stage further smoothens the surface, refining it to eliminate remaining imperfections from the coarse grinding phase. During medium grinding, consider using water as a lubricant if your machine allows for wet grinding. Wet grinding minimizes dust production, which keeps the workspace cleaner and prevents diamond pads from wearing out prematurely. The goal at this stage is to create a smooth, even surface without deep grooves or rough textures.
The final grinding stage uses a fine diamond grit, typically around 120-150 grit, to achieve a polished, smooth surface. This fine grinding prepares the concrete for the epoxy application by reducing surface roughness, which promotes better adhesion. This stage also increases the concrete’s visual appeal, creating a more uniform texture that complements the glossy appearance of the epoxy coating. Consistent, steady movement is important during each grinding pass to avoid gouges or uneven areas. Check your progress periodically to get a uniform finish across the floor.
4. Polishing the Concrete
Polishing begins after grinding, using progressively higher-grit diamond tools to bring the surface to a high shine. Polishing typically involves two to three stages, starting with a 200-grit diamond tool and potentially moving up to 400 grit or higher for a commercial-grade finish. The goal is to create a smooth, even texture with a slight sheen, allowing the epoxy to bond securely and consistently.
For areas exposed to heavy traffic or in industrial settings, consider applying a concrete densifier before the final polishing stages. A densifier chemically reacts with the concrete to harden the surface, making it more resilient and less porous. This application not only improves the polished finish but also increases the concrete’s durability, which will support the epoxy’s longevity.
Following the densifier application, finish the polishing process by moving to the highest grit level needed to achieve the desired look. While a 200-grit polish is typically sufficient for epoxy applications, moving up to a 400 or even 800-grit polish may be beneficial for a highly reflective finish. This final polishing stage creates a glass-like appearance that will visually complement the epoxy, adding depth and a professional touch to the finished floor.

5. Cleaning and Preparing for Epoxy
After polishing, it’s important to thoroughly clean the floor to remove dust, debris, and any residues left from the polishing process. Even the smallest particles can interfere with the epoxy's adhesion, potentially resulting in bubbles or a weak bond.
Start by using an industrial-grade vacuum to collect dust particles from the floor’s surface, paying particular attention to corners and edges where dust often accumulates. A second cleaning pass is recommended to ensure no dust is left behind.
Then, follow up with a wet mop using a pH-neutral cleaner that won’t leave behind oils or residues, as these can interfere with the epoxy bonding. Avoid harsh chemicals or detergents that may alter the concretes surface or compromise the epoxy’s effectiveness.
Make sure the floor is completely dry before proceeding with the epoxy application. Trapped moisture can cause bubbling or peeling in the epoxy layer, affecting its appearance and durability. To quickly dry, use fans or a dehumidifier if necessary, particularly in humid conditions.
6. Applying a Concrete Primer
Priming the polished concrete surface before applying epoxy provides an additional layer of preparation that enhances bonding and fills any minor imperfections left on the floor. Primers also help prevent air bubbles from rising through the epoxy layer, resulting in a more consistent finish.
Select a high-quality epoxy primer suitable for your space and apply an even layer with a roller or brush, following the manufacturer’s instructions. The primer acts as an intermediary layer, creating a secure foundation for the epoxy. Allow the primer to dry completely before moving on to the epoxy application, as curing times may vary depending on environmental factors.
7. Applying the Epoxy Coating
With the polished, primed floor ready, it’s time to apply the epoxy coating. A high-quality epoxy product is important to ensure durability, resilience, and aesthetic appeal. ArmorPoxy offers a range of epoxy products designed for professional results, along with step-by-step instructional guides and videos on their website to assist with the application process.
Start by mixing the epoxy as directed, ensuring a consistent chemical composition that guarantees effective curing. Pour the epoxy into small sections and use a roller or squeegee to spread it evenly across the floor. Be sure to avoid excessive back-and-forth rolling, which can introduce bubbles into the coating. If bubbles appear, use a spiked roller to eliminate them before the epoxy begins to set. Depending on the desired finish, additional layers may be necessary.
Conclusion
Polishing concrete before epoxy application may seem time-consuming, but this process creates a durable, polished finish that’s well worth the effort. By following these steps—preparing the workspace, grinding, polishing, cleaning, and applying the primer and epoxy—you’ll achieve a sleek, professional result that can withstand heavy traffic, resist stains, and look great for years to come.
Polishing is a foundational step in any epoxy project, and the quality of your preparation will directly impact the durability, aesthetics, and longevity of your epoxy floor.
0 comments