

Whether you're a DIY enthusiast looking to spruce up your home or a small business owner seeking a cost-effective method to bolster your interior, concrete polishing can be a transformative process. The benefits of this finished concrete, are manifold - from improved durability to a high-gloss appearance that combats wear and tear.
Our focus will be on practical approaches and expert insights, ensuring your concrete polishing project is a smooth success. In this comprehensive guide, we will walk you through the essential steps of polishing concrete surfaces, equipping you to achieve professional-grade results.
Benefits of Concrete Polishing
The benefits of polished concrete are numerous, but three stand out:
- Durability: A properly polished concrete floor becomes more resistant to spills, scratches, and other types of surface abrasions. It's perfect for high-traffic areas.
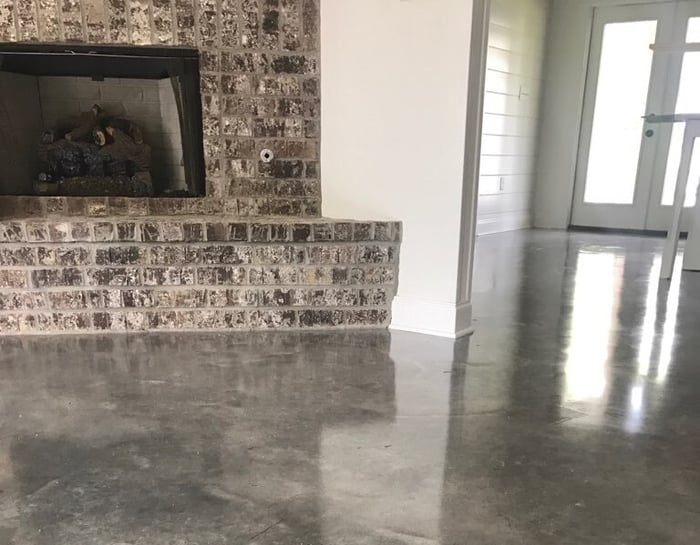
- Aesthetics: The glossy, mirror-like finish of polished concrete can rival traditional stone surfaces, giving a sophisticated and upscale appearance to spaces.
- Low Maintenance: Unlike carpet or tile, polished concrete doesn't harbor dust mites or allergens. Thorough cleaning is a breeze, which makes it a great long-term investment for homeowners and businesses.
Tools and Materials Needed
Before you can get started on creating your polished concrete masterpiece, you'll need to gather the necessary equipment and supplies. Ensuring you have the right tools from the outset will save you time and frustration during the polishing process.
Here's what you'll need:
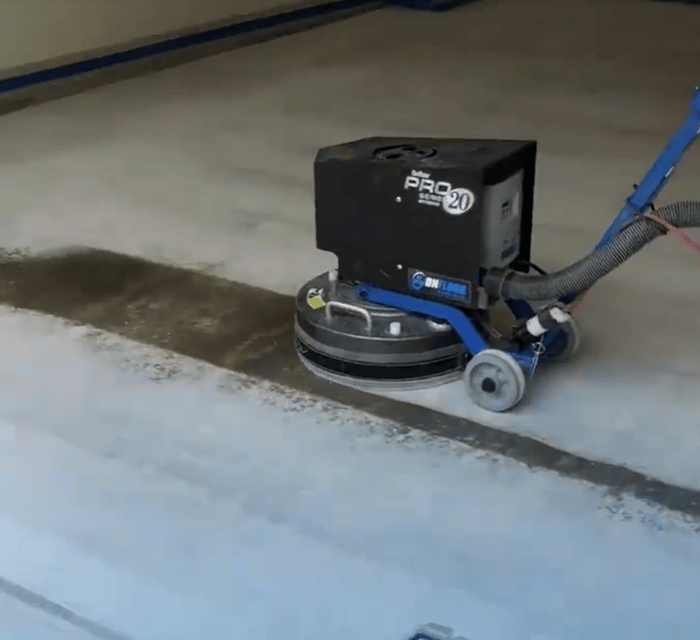
- Concrete Grinder: The grinder is the workhorse of the process. We recommend the Onfloor 20 Pro, which is excellent for smaller spaces and home use.
- Diamond Tooling: These abrasives, layered with industrial diamonds, are used for grinding, honing, and polishing.
- Protective Gear: Safety glasses, dust masks, and ear protection are a must.
- Concrete Hardener and Densifier: This chemical treatment increases the density and the hardness of the concrete, aiding in the polishing process.
- Concrete Sealant: Once the polishing is complete, a good sealant will protect the surface and bring out the shine.
- Sprayer and Mop: These are essential for applying the hardener and sealant evenly.
- Floor Squeegee and Shop Vac: To clean and dry the surface as you progress.
Step-by-Step Guide
Surface Preparation
Before you can start polishing, it is crucial to prep the concrete surface. This involves cleaning the floor thoroughly to remove any grease, oil, or other contaminants. Use a degreaser for any stubborn spots and rinse well.
Next, fill any cracks or holes with a concrete patching compound, and allow it to dry completely. Once the surface is clean and dry, you'll need to decide on the level of sheen you want to achieve, which will determine the grinding grit you begin with.
Grinding and Leveling
Begin by using a coarse-grit diamond grinding tool to level uneven areas and remove the top layer of the concrete to create a smooth and even surface. For larger projects, the Onfloor 20 Pro is an excellent choice, offering enough power to handle the job with ease.
Work in a systematic pattern, overlapping your passes to ensure an even result. As you move on to finer grits, the surface will become smoother and the gloss will gradually increase.
Polishing Process
After leveling, move on to the honing and polishing stages with finer diamond abrasives. The aim here is to create a reflective, high-gloss finish. The process involves multiple steps, gradually refining the grind of the concrete to achieve the desired polish. Be patient and thorough, keeping an eye on the sheen as you go.
Staining and Sealing
If you desire to polish concrete floors with a colored or patterned finish, now is the time to apply stains or dyes. Once the desired color is achieved, you'll want to seal the floor.
Apply a coat of concrete sealant evenly using a sprayer, and work in sections, ensuring complete coverage. Allow the sealant to dry according to the manufacturer's instructions, and apply a second coat if necessary.
Tips and Tricks
Polishing concrete floors is as much an art as it is a science.
Here are some additional tips to ensure you get the best result:
- Take Your Time: Patience is key to successful concrete polishing. Rushing through the stages can result in an uneven finish.
- Keep the Surface Wet: Using a wet grinding method will reduce dust and increase the life of your diamond tooling.
- Experiment with Patterns: If you are looking for a unique design, consider using different types of abrasives and tooling patterns to achieve interesting looks.
- Monitor the Temperature: Be mindful of the temperature of the concrete during grinding and polishing. Overheating can cause discoloration or other undesirable effects.
FAQs
What is the best way to clean and maintain polished concrete floors?
A: Use a neutral pH cleaner and a microfiber mop for regular cleaning, and avoid using harsh chemicals or abrasive cleaners.
Can I polish any type of concrete surface?
A: While most concrete surfaces can be polished, it's important to evaluate the condition of the surface before beginning the grinding process. Cracks, damage, and unevenness can affect the outcome of the polishing.
How long does polished concrete last?
A: With proper maintenance, properly polished concrete flooring can last for decades without the need for major repairs or replacement.
Can concrete polishing be done on outdoor surfaces?
A: Yes, but it's important to use a sealant specifically designed for outdoor use to protect against weather and UV damage.
Is it necessary to hire a professional for concrete polishing?
A: While it is possible to DIY, hiring a professional with experience and the proper equipment can save time and ensure a high-quality result.
How long does the entire concrete polishing process take?
A: The duration of the process depends on factors such as the size and condition of the surface, the desired level of polish, and the equipment used. On average, it can take 1-3 days to complete.
Can polished concrete withstand heavy foot traffic?
A: Yes, polished concrete is a durable flooring option that can withstand high foot traffic, making it ideal for commercial and industrial spaces.
Can polished concrete be used in areas with moisture?
A: Yes, but it's important to use a sealant with moisture barrier properties to prevent issues such as mold growth.
How often should I reseal my polished concrete floor?
A: We recommend resealing every 1-3 years to maintain the shine and protect against wear and tear.
Can I polish concrete with existing coatings or sealers?
A: It is not recommended, as the presence of coatings or sealers can affect the outcome of the polishing process. These should be removed before beginning the process.
Are there any environmental benefits to choosing polished concrete over other flooring options?
A: Yes, polished concrete is a sustainable and eco-friendly choice because it reduces the need for additional materials, such as carpets or tiles, which have a higher carbon footprint.
Is it possible to achieve different colors with polished concrete?
A: Yes, various stains and dyes can be used on a polished surface of concrete to achieve a wide range of colors and patterns.
Is there any special maintenance required for polished concrete floors?
A: Polished concrete floors require regular cleaning and occasional resealing, but there is no need for waxing or polishing like with other flooring options.
Can I install underfloor heating with polished concrete?
A: Yes, underfloor heating can be installed with polished concrete, providing a warm and comfortable flooring option for colder climates.
Can I use rugs or mats on a polished concrete floor?
A: Yes, you can use rugs on concrete floor surfaces or mats on polished concrete floors without damaging the surface. However, it's important to avoid using rubber-backed mats, as they can leave marks on the polish.
Is it possible to repair scratches or damages on a polished concrete floor?
A: Yes, minor scratches and damages can be repaired using diamond abrasives and sealants. However, major damages may require professional help.
Are there any health risks associated with polished concrete floors?
A: No, as long as the surface is properly sealed and maintained, polished concrete does not pose any health risks. In fact, it can be a healthier option, as it doesn't harbor allergens or mold like carpets can.
What is the cost of polished concrete compared to other flooring options?
A: The cost of polished concrete varies depending on factors such as the size and condition of the surface, desired level of polish, and location. However, it is generally more affordable than other high-end flooring options such as hardwood or marble.
Conclusion
Polishing concrete can seem like a daunting task initially, but with the proper guidance and equipment, it is a very achievable goal. The long-lasting benefits of a polished concrete surface are well worth the effort, offering durability, aesthetics, and ease of maintenance.
Whether you're a DIYer or a professional, taking the time to learn the process and follow our guide can lead to a polished concrete surface that is as resilient as it is radiant. Start your transformation today and enjoy the satisfaction of a job well done.
And remember, Onfloor’s range of grinders and diamond tools are invaluable companions on your concrete grinding and polishing journey.
Connect with us
Recent Posts

WANT 10% OFF YOUR FIRST ORDER?

3 comments