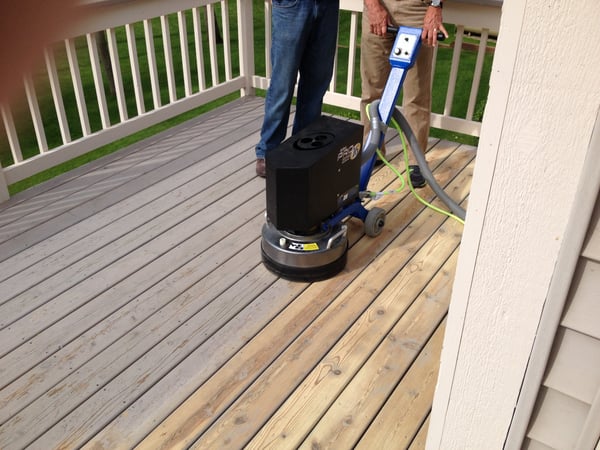
Sanding your interior hardwood floors is one of the easiest projects for at-home DIYers. However, incorrect sanding can permanently damage those expensive, gorgeous floors.
If you’re thinking about sanding your wood floors, you want to be equipped with all the best pro tips and tricks to ensure the job is done effectively.
So we’ve gathered our best Onfloor advice to ensure your sanding project goes “smoothly.”
Why sand wood floors?
You would need to sand your wood floors if you want to:
- Even out scratches and dents
- Level the floor
- Remove light stains
- Re-finish or re-stain the floor
- Re-decorate or refresh the room
Overall, sanding your wood is the first step in restoring your wood floors. Wood floors can be expensive to replace, but they’re easy and cheap to revitalize with a simple sanding and finishing process.

How do you sand wood floors?
1. Prep the room.
Before you even get to the floors, you want to start by prepping the room. Sanding can release a lot of dust into the air, which can do damage to your room and home if you don’t properly prep first.
- Remove all furniture from the room. If there are permanent fixtures, cover with plastic tarp.
- Remove all art and window coverings.
- Remove any doors that open into the room. You can’t completely sand under doors, even when open or closed. Remove these doors to get the most even sanding.
- Cover other doors with plastic tarp.
- Raise any low-hanging light fixtures so you don’t hit your head. You can do so by tying links of the chain together with wire. You can also remove these altogether.
- Put plastic tape over all heating and cooling ducts. This ensures dust doesn’t get in and spread throughout the house. You may want to turn off the HVAC during the sanding process as well so there is less air movement.
- Nail down all loose boards with finishing nails. If loose boards come up during sanding, it can cause permanent damage.
- Countersink all nails by 1/8 inch. If nail heads are exposed, they can rip the sanding belt or drum. To detect if a nail is too high, gently pull a metal snow shovel (upside down) across the floor. You’ll hear a metallic sound if it hits a nail.
Prepping can be a surprisingly long process, so plan for this in your project time.
2. Remove base shoe.
Part of the prepping process is removing the base shoe. The base shoe is the molding at the bottom of the baseboards. Edge sanding will slightly lower and level the floor, so the baseboard will look slightly raised. It makes more sense to remove the base shoe and re-install it so you can cover the change in floor level.
Plus, edge sanding can scuff up the base shoe so you would have to do touch-ups or full replacements anyway.
Label each molding plank on the back so you know on which wall it should be reinstalled.
3. Choose a sander.
There are different types of sanders and grinders for different projects. Typically, you’ll want to choose a sander based on its speed, power, and square footage covered.
You will want to use a low or variable speed for wood sanding. Low speeds allow for better control on softer materials, like wood. This control helps minimize damage like gouging or over-sanding.
Variable speed allows you to maintain control at lower speeds, but you can change the power based on the needs of your floor. It’s also a more flexible investment that you can use for a number of flooring projects.
We recommend our two low and variable speed sanders:
Learn how to choose the right floor grinder and sander for your project here.
If you’re not sure which floor sander is right for your hardwood, consult with an Onfloor specialist now.
4. Select the grit.
The lower the grit, the coarser the particles in the sandpaper. This means a heavier sanding requires a lower grit while gentle smoothing requires a higher grit.
When you’re sanding your wood floors, you’ll want to start with a lower grit and work your way up to a finer grit. The lower grit can remove the top layer of finish and sealant, the medium grits will remove scratches and level the floor, and the higher grits will smooth and even out the wood.
This means you’ll want to have several grit sandpapers on hand to comprehensively complete the job from start to finish. Check out some of our sandpaper below:
You’ll also need a hook and loop pad driver to hold the sandpaper. Choose the size that fits your machine and grit of sandpaper.
5. Sand for multiple rounds
Some DIYers make the mistake of stopping the sanding process once the finish is gone. But doing so leaves scratches and dents in the wood that can create an unattractive appearance once finished.
You want to go through a series of grits with multiple sanding rounds to ensure you remove all scratches and flatten wood to look fresh and revitalized. If you don’t sand enough, you’ll end up with a dull and dented floor.
You typically want a four or five step sanding process. For coarse-grained wood, like oak, you’ll want a 36-50-80-100 grit process. If you have more fine-grained wood like birch or maple, you can move up to a finer grit like 120 for the finishing process.

6. Change sand belts frequently.
You want to make sure you change your sanding belts frequently. Fresh, sharp belts can sand faster and deliver better results.
This is especially important after you’ve finished removing the floor sealant. It can be challenging to see if the sander is doing its job on already sanded wood. A dull sandpaper won’t be able to cut into the wood and remove scratches from the previous grit, which can re-appear only after you finish the floor.
You’ll want to judge the freshness of the sandpaper based on the square footage covered. Ask your manufacturer how much footage the sandpaper and disc will cover before needing to be replaced. Keep this in mind while sanding and replace frequently.
7. Handle stains.
Most water stains will be removed during the sanding process. This is because water sits in the top layers of the wood, so several sanding processes can remove these top stained layers.
However, some stains won’t come out with sanding. For example, pet urine can penetrate deep into the wood, and it won’t go away even with a full process of sanding.
If you have dark pet urine stains (which are usually gray with black around the edges), you may need to replace those wood boards. You can try a bleach formulated for wood floors, but these usually leave the floor pitted and blotched anyway. We recommend replacing those planks of wood before beginning your sanding process.
8. Vacuum.
After each round of sanding, you’ll want to vacuum up any dust. Even the best abrasives throw off granules and particles. If these granules get stuck in the belt of the sander during the next round, it can leave marks and dents in the floor.
Check out our Onfloor Dynavac Pro 2000 Vacuum Dust collector. The shaking cleaning system helps collect dust quickly while the washable filter minimizes maintenance and reduces cost. It has an efficiency rating of 99% at 0.5 microns, making it one of the best dust collection systems for wood sanding.
9. Sand the edges.
You typically don’t want to use the same sander or grinder for the edges because they could damage the wall or baseboards. A floor edger is a sanding disc that is made to go right up against the baseboard.
Like the main floor, you should edge in the same series of progressively higher grits. Make sure that the sanding drum grit matches with the sandpaper grit.
Check out our gentle but powerful floor edger, the OFEdge120 Single Speed Floor Edger.
To remove deep swirls, you can place a nylon pad under the sandpaper for extra cushion. After the job is done, lay a flashlight on the floor to highlight any leftover swirls. If there are any swirls left, hand-sand them with 80- or 100- grit sandpaper.
10. Fix the corners.
Usually, edgers and sanders can’t reach sharp corners. You’ll want to hand-sand these corners with a sandpaper of 80- or 100- grit.
11. Screen the floor.
After sanding, the floor will look great on its own. But don’t forget to screen it. Neglecting this process can create an uneven appearance after finishing.
“Screening” blends together the main floor with the edges, since you used different tools for each. This also polishes away any standing or leftover scratches.
Conclusion
Sanding hardwood is one of the easiest at-home projects—but there are a lot of nuances to be aware of.
If you’re not sure of the right sander, edger, or grit for your project, contact Onfloor today! We’ll help you find the perfect lineup to make your sanding job smooth and easy.

5 comments