

Are you finally sick of staring at that old, dull concrete walkway, patio, or garage floor?
Give your worn-down concrete a new life by staining it.
Stained concrete is attractive to many people who want to achieve unique results for a reasonable cost. You can stain concrete for as little as $2 per foot.
To stain concrete, it must be unstained and unpainted. Remember, concrete is porous, so once it's stained, there is no going back.
Ready to get started? Keep reading for a supply list and steps to staining concrete at home.
Supply List
Before beginning your project, you must stock up on tools and supplies. You will need the following for this project:
- Tear-resistant deck paint pad
- Telescoping rod
- Handle for paint pad
- 4" Paintbrush
- Paint pan
- Broom and hose
- Tarp
- Concrete stain
- Water
- Old rags (for any spills)
Now, you can move on to planning and preparing for your project.

1. Choose a Stain and Color
As you prepare to stain your concrete surface, keep in mind that the outcome you achieve is permanent. For this reason, you must take your time and work carefully for good results. The amount of work to be done depends on the size of the area you're staining, but expect the project to take several days due to drying time.
First, choose a stain that best fits your needs. You have two concrete stain options: water-based concrete stain and acid-based concrete stain.
Water-Based
Water-based concrete stains are easier to apply and come in a wide variety of colors. This non-reactive stain produces color by bonding to the surface of the concrete. It fills the concrete's pores and produces a colored coating or film. Water-based formulas tend to have fewer toxic chemicals and dry more quickly.
When selecting your color, use the stain manufacturer's color chart as a guide. There will be different levels of coverage, depending on the stain option. A semi-transparent stain will look similar to a watercolor once applied. If you're looking for more coverage, choose an opaque stain.
Acid-Based
Acid-based concrete stains are more resistant to fading. They create a permanent chemical bond by reacting chemically with the concrete. It doesn't peel or chip, which produces a natural-looking finish.
2. Prep the Surface
The most important step of this project is to prep your concrete floor for stain. If you're staining new concrete, it must be at least four weeks old.
Remove all items from the floor and clean it thoroughly. Next, sweep and mop the floors to remove all dirt, dust, and debris. Anything leftover will show through the stain—impacting the finished look.
You can use a pressure washer to remove stubborn marks and discoloration if needed.
This phase is also when you should take the time to repair visible cracks in the concrete surface. Complete all repairs before beginning the staining process. You should also remove any coating or stain before starting.
To fill gaps along the floor, use a concrete crack sealant and allow it 24 hours to dry completely. Then, buff away uneven patches with a floor scrubber.
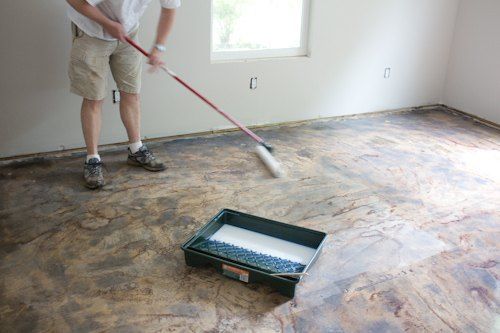
3. Apply Stain
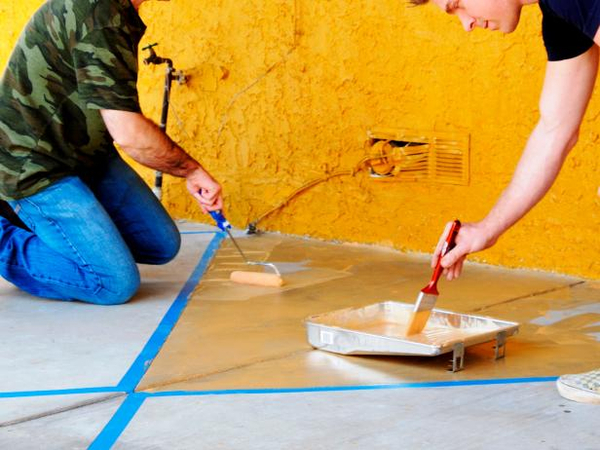
First, apply the stain around the perimeter of the room with a 4" paintbrush. Working in one section at a time, apply in broad strokes. This method helps blend the stain before it dries too quickly. After you've used the stain on your paintbrush, use the brush to even out what you just applied to diminish the appearance of any lines or brush strokes.
Then, dip your brush in the stain and repeat the process, staining the rest of the floor. Move along the natural seam of your concrete and work in sections, applying with a paintbrush or sprayer for large areas. Using a spraying applicator will help evenly apply the stain.
Tips
As you stain, here are a few tips that may help:
- To avoid unintentional staining, carefully mask off surrounding areas.
- Always test the stain in a small, inconspicuous area of the concrete you're treating. Several variables will affect the final color, so make sure you approve of the preview of the finished look.
- If you want the color to be more intense, apply the stain soon after placing concrete.
- Dilute the stain by adding water to produce various concentrations of color. You can wet the concrete before applying the stain or spritz the concrete with water after application.
- If certain areas aren't staining well, you can apply a concrete tint or dye.

4. Allow to Dry
After you apply the first coat of stain, allow it to dry. The time it takes the floor to dry will depend on your climate—times vary based on temperature and humidity.
Wait at least three hours for the stain to dry before applying another coat.
5. Apply Second Coat of Stain
If you wish, apply a second coat of stain. The more coats you apply, the more intense the final color will be. Acid stains usually only require one or two coats; however, water-based stains can be applied repeatedly for a deeper look.
6. Rinse the Concrete
Once you're happy with the application, you must rinse the concrete with water until you see the water run clear.
If you're using an acid-based stain, neutralize it with baking soda or ammonia.
Finally, use a soft-bristled brush or broom to loosen any residue before rinsing again. When you think the floor is dry and ready, test an area by wiping it with a white cloth. If you see residue, rinse and dry the stain again. Repeat until you no longer see residue on the cloth.
7. Add Protective Coating
The last step is to add a concrete sealer to protect the finish of your newly stained concrete. You should also test the sealer before application. To enhance the depth of color and repel dirt, use a clear sealer to stand up to environmental wear.
Allow the new stain to cure for 24 hours before adding the protective coating. Plan to allow at least two days for the sealer to harden completely.
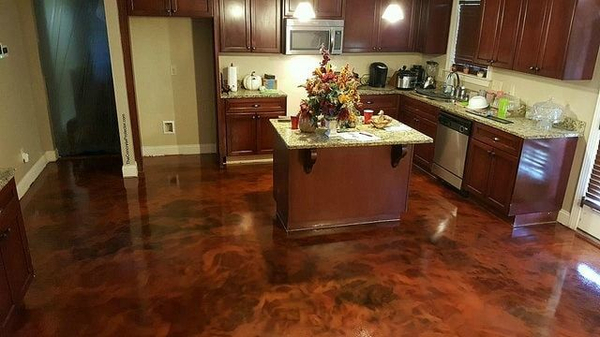
Bring New Life to Your Concrete Floors
Now that you know how to stain concrete, you can bring new life to your concrete surfaces.
Any patient DIYer with instructions, stain, and an applicator can complete this job in a couple of days. If you have questions about the process or need help finding the best tools and stain for the job, contact Onfloor for a free consultation.

Connect with us
Recent Posts

WANT 10% OFF YOUR FIRST ORDER?

3 comments