

Updated April 19, 2023
Are you looking to give your concrete floors a modern facelift without the hefty price tag and hassle of removing them? Staining concrete floors is a great way to do so! Staining your concrete floor can give it an elegant look, but there are several steps you must take before you begin.
Typically, a basement floor or a garage floor is the best type of concrete to stain because those surfaces are not exposed to extreme conditions such as rain or snow. However, any concrete surface can be stained provided that it is properly prepped before staining.
For instance, you can transform the aesthetic of your home or office by using acid or water-based stains on concrete surfaces. Through a chemical reaction, this simple application will draw out deep tones like tan, cola brown, black, red, and green for an exquisite look that is both luxurious and professional. Here's what you need to know before you begin.
Basic Process Overview
So you want to upgrade the look of your concrete floors, but you don’t want the major cost or inconvenience that comes with entirely replacing concrete. Staining your floors is cost-effective and a great alternative to replacing them.
Whether it is a home or business flooring, you can update your concrete with an acid or water-based stain. A concrete stain creates a chemical reaction that will bring out the natural colors in your concrete. But before you apply a stain, you need to prep the floor thoroughly for staining. An effective stain starts with a clean and clear concrete surface. If you don’t, you’ll be left with floors that are irreversibly marked and damaged.
Now, let's look into the basic process overview of how to prep your concrete floor for staining.
Start by cleaning the floor thoroughly with a concrete degreaser and water.
To prepare the concrete floor for staining, you’ll need to first clean it of any dirt or debris. You can do this with a broom and dustpan, or with an industrial wet vacuum. This will remove dirt from the surface, as well as any grease or oil that may have been left behind. Oil stains, urine stains, or other difficult-to-remove messes, may require a stronger degreaser. Once the floor is clean and dry, you can begin with sanding or grinding. Remember, a substandard cleaning job will surely lead to a substandard staining job so take your time and make sure you get it right the first time.
Depending on the condition of the concrete, it may need some additional prep work before staining. If it’s particularly rough or has high spots that need to be leveled out, you may need to grind or sand the surface. If a high-powered grinder isn’t an option, then you can use sandpaper to get the job done.
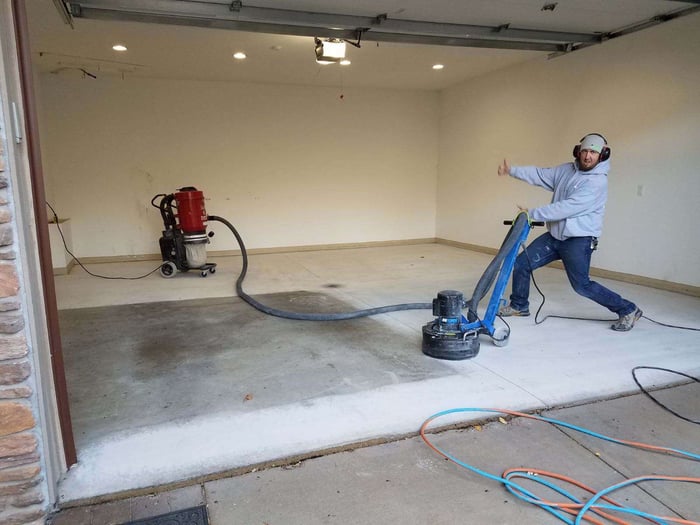
Next, use a concrete grinder to etch the surface of the floor.
This will open up the pores of the concrete, allowing for better absorption of the stain. Be sure to wear safety equipment such as masks and gloves while doing this.
Once the grinder is finished, use a mastic remover to get rid of any unwanted residue remaining.
This is mostly from carpet glue or other materials that were previously applied to the floor. Make sure all cleaning solutions used are safe for concrete, as some products will inhibit concrete stain penetration.
Now you’re ready to apply the stain.
Two Types of Concrete Stains
There are two types of stains: acid and water-based.
Acid Stain
Acid stains rely on chemical reactions between the acid in the stain and minerals already present in the concrete surface. This creates a deep, mottled look with a variety of earth tones. Acid stains react differently to each concrete surface, so it’s best to experiment on a small area before committing to an entire room. Because it’s hard to control the reaction, acid-stained concrete has a slightly unpredictable outcome.
Water-based Stains
Water-based stains, also known as acrylic stains, are easy to apply and can be used to create a variety of colors. These are typically more vibrant than acid stains and offer better color control. Water-based stains are also more consistent in tone and are controlled in application. They produce a variety of colors and can be applied directly onto dry or wet concrete surfaces. It is easy to clean up, requires no special equipment and provides a durable finish.
LET’S DIVE DEEPER INTO THE PREP PROCESS FOR REMOVING ANY CONTAMINANTS AND MARKS ON YOUR CONCRETE FLOORING.
1. CHECK FOR CONTAMINANTS
Start by spraying your concrete floor with a gentle spritz of water. This will help you figure out if there are contaminants on your floor. If the bare concrete floor darkens and the water penetrates, then there is no sealer present. If the floor doesn’t darken and the water beads up, the area is sealed and the sealer must be removed mechanically.
Glues, paints, caulking, and mastic can all cling to concrete, so this can be a challenge to remove when it comes time for concrete staining. It’s important to rid the floor of all contaminants first because the chemicals of an acid stain can have a chemical reaction with these materials (rather than the concrete itself) and can permanently damage the floor.

2. SCRAPE THE CONTAMINANTS
Using a floor scraper, pull up as much of the mastics and glues from the floor as you can. If the glue isn’t coming up easily, don’t force it as this could damage the floor. What you can do is to use a small handheld propane torch to warm up the area that is stuck. The heat should loosen things up enough for you to pull it up with the floor scraper.
3. APPLY A CHEMICAL SOLVENT
Concrete chemical solvents can loosen any remaining contaminant residue. Follow the directions on your chemical stripper for proper usage. As an additional precaution, you should use a stripping solution made specifically for concrete so as not to harm the pores of the material.
Apply the chemical solvent to the floor in thin, even strokes. You may want to consider using an automated spray system to ensure the chemical is applied evenly. Let sit for 1-10 hours, depending on the instructions on the bottle.
(Do not use an acid wash. Acid washes will strip away the necessary chemicals that an acid stain will need to interact with in order to color the concrete.)
4. SCRUB
The solvent has now loosened the mastic, so it’s time to “exfoliate” the residue away. Grab a rotary floor machine or grit scrubbing brush to remove the loosened glue and paint from the floor. This is the most important step as the scrubbing clears the floor of the contaminants—even with the glue that are deep-rooted in the pores of the concrete. Our Onfloor equipment removes mastic and glues without any added elbow grease. Check them out here.
.jpg?width=700&height=407&name=Spectrum%20Owasso%20repair%204%20(1).jpg)
5. NEUTRALIZE THE CONCRETE FLOOR
After you’ve scrubbed away the mastic and paints, you need to neutralize the floor. This will help pick up the gunk that was scrubbed up. This will clean and sanitize the surface of the floor to prepare for the staining process. You can do this step with a pH neutral cleaner a detergent. Hot water can also be used to clean and neutralize the surface.
Next, mix a concrete cleaner and degreaser in a large mop bucket. Pour or spray the diluted solution on the floor. Agitate with a high-speed floor machine. As an alternative, you can also spray the floor with a power washer to try to get rid of any leftover chemicals and contaminants.
Follow up with a wet vacuum and squeegee to help pull up the remaining solvent and dry the floor. Consider using an air mover to fully dry the floor in order to avoid any water or droplet stains.
6. STAIN THE FLOOR
Now, you’re ready to go about the staining process. Your floor is clean and contaminant-free, perfectly prepped for a gorgeous acid or water-based stain. Follow the directions of your stain carefully as each one is different. And remember—safety first! Make sure to use personal protective equipment, such as goggles, gloves, and a mask.Start by diluting your acid or water-based stain with the appropriate amount of water.
Apply the mixture and use a brush to evenly distribute it along the length of the floor. Allow the stain to sit for 1-2 hours before cleaning up any excess material.
7. SEAL THE FLOOR
Once your concrete floor is stained, it must be sealed to protect it from potential damages like scratches, stains and water damage. Depending on the type of finish you’re looking for, there are various types of sealers that can be used.
For a glossy look, an acrylic sealer is the best option. For a matte finish, an etching or silicate-based sealer works well. If you prefer a natural look with no sheen, opt for a penetrating sealer.
Apply the sealer with a roller or brush, making sure to cover every nook and cranny. Allow the sealer to dry overnight before walking on it. Keep in mind that you should always do a test patch first to make sure you get the desired results! Now your concrete floor is ready for use.
THE BOTTOM LINE
Clean, re-clean, and then clean again. A spotless, prepped surface is necessary for a stunning concrete stain. If the stain doesn’t turn out as expected, chances are there were contaminants present in the floor that caused an uneven color and finish.
If you want to make your concrete pre-stain prep easier, invest in Onfloor mastic and glue removal tools. You’ll remove contaminants and clean the floor without any headache or intensive labor… all without breaking the bank! Check out the equipment here to start prepping.

Connect with us
Recent Posts

WANT 10% OFF YOUR FIRST ORDER?

0 comments