

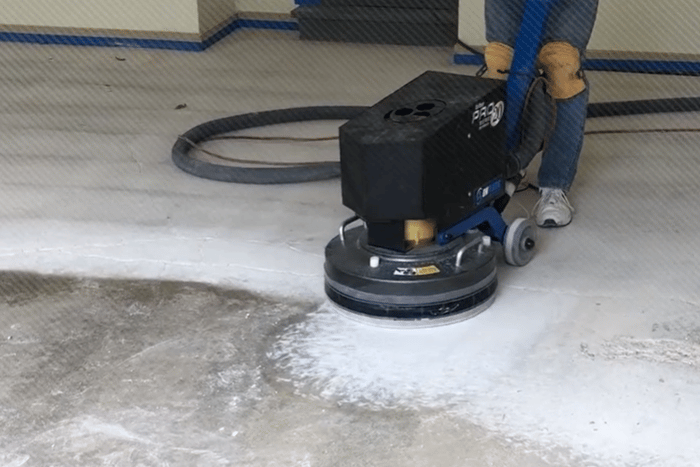
Grinding down concrete is an essential skill for any contractor or concrete professional. Whether you’re preparing a surface for a new floor, leveling a slab, or exposing aggregate for a polished finish, understanding the best methods and tools for concrete grinding can make all the difference.
This guide dives deep into the top techniques for concrete grinding, as well as the best tools for the job. From hand-held grinders to large industrial machines, we’ll cover everything you need to know to master the art of concrete grinding.
Why Grind Concrete? Understanding the Basics
Grinding concrete is the process of removing imperfections or unevenness on a concrete surface with specialized tools like grinders. It’s a technique used across several applications, including:
- Surface Preparation: Removing coatings, adhesives, or residue from previous flooring.
- Smoothing and Leveling: Eliminating high spots or dips in a concrete slab.
- Polishing: Achieving a smooth, glossy finish by exposing aggregate.
- Repair Work: Preparing surfaces for patches or overlay materials.
When executed correctly, grinding makes a surface stronger, more even, and ready for whatever’s next.
.jpg?width=700&height=525&name=OF%20Training%201%20(2).jpg)
When is Grinding Necessary?
Grinding is essential for projects involving old, damaged, or uneven concrete surfaces. Common scenarios include:
- Preparing a surface for epoxy or decorative coating.
- Resolving tripping hazards caused by uneven slabs.
- Polishing floors for retail spaces, offices, or showrooms.
- Exposing decorative aggregate for architectural beauty.
Preparing for Concrete Grinding
Before firing up your grinder, preparation is key to ensure the best results. Preparing concrete floors is crucial for achieving a smooth and durable surface. Here’s how to get started:
Using a diamond blade with an angle grinder can effectively grind down a concrete slab by half an inch, providing faster results and better dust control.
Step 1: Inspect the Surface
Walk through the entire project area. Look for cracks, damage, coatings, or unevenness. If there are significant flaws, it might be better to use a scarifier before grinding. This machine has rotating blades and is more aggressive, removing thick coatings or damaged concrete quickly. Assessing the surface condition is crucial for achieving high-quality ground concrete, as it ensures the surface is properly prepared for polishing and coating.
Step 2: Protect the Area
Concrete grinding creates a lot of concrete dust, such as silica dust, so it’s critical to cover and protect any surrounding areas. Use plastic sheeting or tarps to contain the mess.
Step 3: Gather the Right Tools
A typical grinding setup to prepare surfaces to install flooring includes:
- Concrete Grinder: This is the primary tool for grinding. Be sure to choose a concrete grinder like the Onfloor 20 Pro that will provide returns for years to come.
- Diamond Grinding Pads: The type of pads you choose depends on the surface and finish you’re aiming for.
- Angle Grinder: A handheld tool effective for grinding down concrete surfaces, especially for removing imperfections on concrete slabs. Use proper attachments like diamond cup wheels for the best results. Attaching a vacuum can help manage the dust generated during the process.
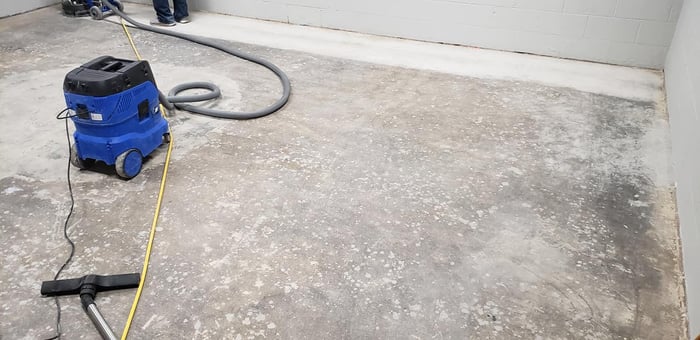
- Vacuum System: To control dust during the process.
- Personal Protection Gear: Wear safety glasses, gloves, a dust mask, and ear protection.
Step 4: Prepare the Grinder and Grind
Attach the appropriate diamond grinding pads to the grinder. Ensure that all connections are secure and that the machine is in good working condition. Then, begin grinding in a side-to-side motion. Start with a coarse grit and gradually work your way up to finer grits for a smooth finish.
Concrete Grinding Techniques
Concrete grinding requires patience, precision, and control. It can be a time-consuming task that requires patience and the right techniques. Here’s how to approach common situations:
Surface Preparation
- Start with a coarse grit pad (30-40 grit) and make overlapping passes over the concrete floor surface.
- Gradually increase grit levels to remove any scratches or imperfections created by previous passes.
- Finish with a fine-grit pad (80-120 grit) for a smooth surface.
- Change the direction of each pass by 90 degrees to ensure even coverage.
Smoothing and Leveling
- Begin with a coarse grit pad (30-40 grit) to level out the surface and remove high spots.
- Continue with finer grit pads (50-60 grit) until the surface is smooth and even.
- Use a handheld grinder for tight or hard-to-reach areas.
- Vacuum up any dust or debris between passes to ensure a well-ground surface.
Polishing
- Start with a medium-fine grit pad (80-120 grit) to expose aggregate and create an even, uniform finish.
- Progress to finer grits (up to 3000 grit) to achieve a polished, glossy look.
- Use densifiers or sealers for added protection and shine.
- Change the direction of each pass by 90 degrees to ensure even coverage.
Repair Work
- Use a scarifier or grinder with a diamond grinding wheel to remove damaged or uneven concrete.
- Fill any holes or cracks with an appropriate patching material.
- Follow the steps for surface preparation and smoothing/leveling as needed for the specific repair area.
Mastering Concrete Grinding Techniques
Concrete grinding can be challenging, so it’s crucial to use proper techniques for optimal results. Here are some tips:
- Keep Your Grinder Moving: Move your grinder in a back-and-forth motion or in circles. Avoid staying in one spot longer than necessary.
- Use Overlapping Passes: For even results, overlap each pass by about an inch.
- Grind Wet Whenever Possible: Wet grinding helps control harmful dust and keeps the pads cool, increasing their lifespan. However, ensure your concrete grinder is equipped to grind wet concrete.
- Start with a Coarse Grit: Begin with a lower grit pad and make multiple passes before moving to a higher grit. This approach ensures even grinding and prevents skipping over imperfections.
- Check Your Progress Regularly: Stop periodically to assess your work. If any areas still have coatings or unevenness, go back over them until they're resolved.
- Switch Pads Frequently: As you move up in grit levels, switch out pads frequently for best results.
Additional Tips
When it’s time to start grinding, proper techniques are key to achieving smooth and professional results. Here’s a step-by-step look at the process:
Start with Coarse Grit Pads
If you're dealing with uneven surfaces, begin with a coarse grit pad (30–40 grit) to remove material quickly. Move the grinder in overlapping passes to cover the area uniformly.
Adjust Pressure and Speed
Onfloor grinders often offer adjustable pressure and speed settings. Use lower speeds for initial material removal and higher speeds for a finer finish.
Work in Sections
Divide the area into smaller, manageable sections and focus on one at a time. Move methodically to avoid skipping spots or leaving uneven patches.
Transition to Finer Pads
Once you've removed major imperfections, switch to finer pads (80–120 grit) to smooth the surface. For polishing, you’d progress to even finer grits (400–3000 grit) based on the level of shine desired.
Keep It Clean
Dust can interfere with your visibility and the grinder's efficiency. Use a vacuum system, and clean the surface periodically throughout the process.
Inspect as You Go
Continuously check your progress and don’t hesitate to retrace steps over stubborn areas. The goal is a consistently even, smooth surface.
Common Challenges and How to Overcome Them
Concrete grinding comes with its share of challenges, but with the right approach, they’re easy to manage.
Problem 1: Uneven Results
Uneven concrete happens for various reasons, such as uneven pours or damage. It's important to address these issues before attempting grinding.
Solution: Use Coarse Grit Pads
Begin with a coarse grit pad (30-40 grit) and make multiple passes until the surface is level. Increase the grit levels gradually for a smooth, even finish.
Problem 2: Clogged Grinding Pads
Grinding pads can become clogged quickly, affecting their effectiveness and lifespan.
Solution: Clean or Replace Pads Frequently
Stop your grinder periodically to clean or switch out clogged pads. Keeping them clean and sharp will improve results and help save time and money in the long run.
Problem 3: Hard-to-Reach Areas
Some areas may be difficult to reach with a large, industrial grinder.
Solution: Use Handheld Grinders or Specialty Tools
For tight spaces or edges, use handheld grinders with diamond grinding pads. For vertical surfaces, such as walls or columns, consider using specialty tools like a cup wheel grinder.
Problem 4: Dust and Debris Management
Concrete grinding produces a lot of dust and debris, which can be harmful to health and damage nearby items.
Solution: Use Proper Protection and Contain Dust
Wear protective gear like masks and goggles while grinding. Also, use proper vacuum systems to contain dust and protect surrounding areas from damage.
Problem 5: Residue Buildup
Residue buildup can occur from coatings, adhesives, or other materials that remain after grinding.
Solution: Switch out pads frequently.
Don't forget to use a vacuum system to keep the surface clean throughout the process. You may also need to use chemicals or a scraper in some cases.
Problem 6: Hard-to-Remove Coatings
Some coatings, such as epoxy or paint, may be challenging to remove even with coarse grit pads.
Solution: Use a Coating Removal Tool or Chemicals
For stubborn coatings, consider using specialized coating removal tools or chemicals to soften and break them down before grinding. This will make the grinding process more manageable and efficient.
The Cost of Mistakes in Concrete Grinding
Failing to execute a concrete grinding task properly can lead to uneven surfaces, improper adhesion for coatings, or an unproductive work process. Investing in a premium tool like an Onfloor grinder minimizes these risks, helping you get it right the first time.
Remember to use proper techniques, keep your grinder moving, and stay patient. With these tips in mind, you'll be well on your way to mastering concrete grinding techniques.
The Advantages of Onfloor Concrete Grinders
Onfloor grinders stand out for many reasons:
- Multi-Surface Capability: Onfloor grinders aren’t limited to just concrete. They’re versatile enough for other flooring surfaces like wood and stone, making them a great long-term investment. Because of our quick-change tooling system, you can switch out your grinding pads easily for different surfaces.
- Ease of Use: Onfloor grinders are user-friendly and require minimal training to operate effectively.
- Time-Saving: With the right approach and a powerful tool like an Onfloor grinder, you can complete concrete grinding tasks quickly without sacrificing quality.
- Efficiency: Onfloor grinders are designed to maximize efficiency through features like adjustable pressure and speed settings, making it easier to achieve professional results.
Elevate Your Grinding Game
Concrete grinding doesn’t have to be intimidating or overly complicated. With the right tools, proper techniques, and a clear focus on results, you can transform any concrete surface into a flawless masterpiece.
Onfloor grinders offer the perfect combination of power, precision, and versatility. Whether you’re leveling a slab or polishing for a showroom finish, our products ensure every grind is a success.
Take the next step in mastering concrete grinding. Explore our top-quality concrete grinders and accessories designed to make every project a breeze.
Connect with us
Recent Posts

WANT 10% OFF YOUR FIRST ORDER?

1 Comment