

Are you tired of looking at your dull, cracked concrete surfaces? Don't worry! With the right concrete resurfacing options, you can transform your old, worn-out concrete into a stunning and durable surface that will impress anyone who sets foot on it.
But with so many options available, how do you choose the best one for your needs? In this article, we will guide you through the process of selecting the ideal concrete resurfacing option that will breathe new life into your space.
Why Concrete Resurfacing?
Before we delve into the selection process, let's take a moment to understand why concrete resurfacing is an excellent choice for rejuvenating your worn-out surfaces. Concrete resurfacing offers a cost-effective solution to enhance the appearance and functionality of your existing concrete.
Instead of completely replacing the concrete, resurfacing allows you to overlay a fresh layer on top, saving you both time and money. Moreover, it provides an opportunity to customize your surfaces with various finishes, colors, and patterns, giving you endless design possibilities.
Factors to Consider
When choosing the best concrete resurfacing option, several factors come into play. By carefully considering these aspects, you can make an informed decision that aligns with your specific requirements. Let's explore each factor in detail:
.jpg?width=700&height=455&name=3.1.17%20Griding%20in%20Warehouse%20w%20Bar%20(1).jpg)
1. Surface Condition and Preparation
The first step in selecting a concrete resurfacing option is assessing the condition of your existing concrete surface.
Is it cracked, chipped, or stained? Are there any underlying structural issues? Identifying these issues will help you determine the type of resurfacing system that suits your needs.
It's essential to properly prepare the surface by cleaning, repairing any damages, and ensuring it is free from any contaminants.
2. Durability and Performance
The durability and performance of the resurfacing option are crucial, especially if you're considering high-traffic areas or outdoor spaces.
You'll want a solution that can withstand heavy use, resist abrasion, and endure environmental factors like UV rays and temperature fluctuations. Look for options that offer excellent strength and longevity to ensure your investment pays off in the long run.
3. Aesthetic Appeal
Concrete resurfacing is not just about enhancing functionality; it's also an opportunity to elevate the aesthetic appeal of your space. Consider the desired look you want to achieve.
Do you prefer a sleek and modern appearance or a more natural and rustic vibe? Look for resurfacing options that offer a wide range of colors, finishes, and patterns to create the desired visual impact.
4. Maintenance Requirements
Nobody wants to spend hours maintaining their concrete surfaces.
That's why it's important to consider the maintenance requirements of different resurfacing options.
Some solutions may require regular sealing or periodic touch-ups, while others may be virtually maintenance-free. Assess your willingness to invest time and effort in maintenance and choose accordingly.
A concrete resurfacer can provide a cost-effective solution to enhance the appearance and functionality of your existing concrete surfaces.
5. Budget
Budget is often a significant deciding factor when it comes to resurfacing concrete and any home improvement project. Concrete resurfacing options vary in cost, depending on the complexity of the application and the materials used.
Set a budget and explore options that align with your financial constraints. Remember to consider the long-term value and durability of the chosen option to make a wise investment decision.
6. Expertise and Installation Process
Consider the complexity of the installation process and whether you have the necessary skills and tools to undertake the project yourself. Some resurfacing options require professional installation, while others may be suitable for a DIY approach. Assess your expertise and the time you can dedicate to the project before making a decision.
Concrete slabs, driveways, concrete patio, and other surfaces can benefit from resurfacing.
Concrete Resurfacing Options
Now that we have discussed the factors to consider, let's dive into some of the popular concrete resurfacing options available for your concrete resurfacing project:
Stamped Concrete Overlays
If you're looking to add texture and intricate patterns to your concrete surface, stamped concrete overlays are an excellent choice.
This option involves pressing or stamping patterns onto the freshly applied overlay, creating a realistic and decorative effect. With a wide variety of patterns available, including brick, stone, and wood, you can achieve the look of expensive materials at a fraction of the cost.
Microtoppings
Microtoppings are thin overlays that provide a smooth and uniform finish to your concrete surfaces. They are typically applied in layers as thin as 1/16th of an inch, making them a great option for restoring worn-out or uneven surfaces.
Microtoppings can be colored and stained to achieve a custom look, giving you endless design possibilities. A concrete slab, for example, can be transformed into a seamless surface with a microtopping overlay.
Spray-down Systems
If you're looking for a slip-resistant surface that can withstand heavy foot traffic, spray-down systems are worth considering. These systems involve spraying a textured coating onto the concrete surface, which creates a non-skid finish. Spray-down systems are commonly used for pool decks, patios, and other outdoor areas where safety is a priority.
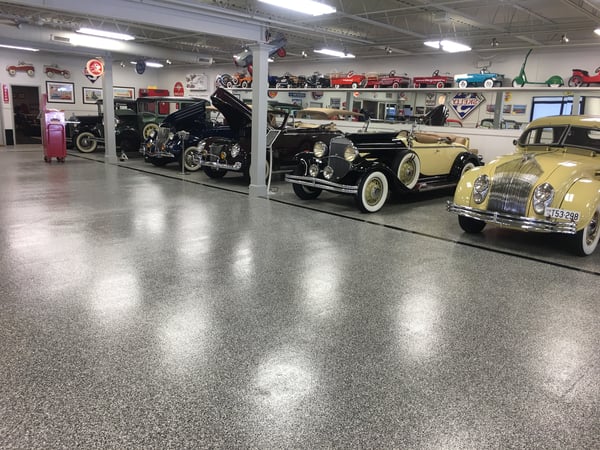
Epoxy Coatings
Your concrete floor can be revitalized with an epoxy coating, which provides exceptional durability and protection.
For a high-performance and durable concrete surface, epoxy coatings are an excellent choice. Epoxy is a two-part resin that, when applied to the concrete, forms a tough and resistant coating.
It offers excellent chemical resistance, making it suitable for garage floors, industrial spaces, and areas prone to spills or heavy impacts. Epoxy coatings are available in a variety of colors and finishes, allowing you to achieve a polished or matte look.
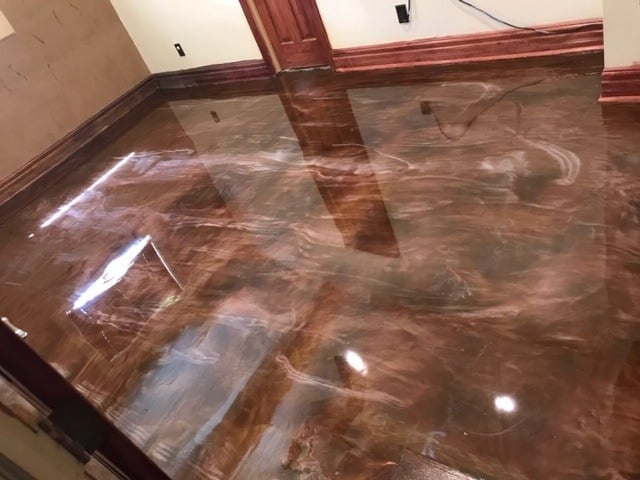
Stained Concrete
If you want to enhance the natural beauty of your concrete while adding color and depth, stained concrete is a fantastic option. Stains penetrate the concrete surface, creating rich, translucent hues that mimic the look of natural stone or marble. Whether you prefer earthy tones or vibrant colors, stained concrete can transform your space into a work of art.
Self-leveling Overlays
Self-leveling overlays are an ideal choice for correcting uneven or damaged concrete surfaces. These overlays are designed to flow and self-level, creating a smooth and even finish.
They can be applied in various thicknesses, allowing you to correct minor imperfections or completely resurface the concrete. Self-leveling overlays provide a seamless and durable solution for both indoor and outdoor applications.
Sound concrete resurfacing material is essential when you are planning to resurface your concrete. Choose an option that suits the space and meets your needs.
Broom Finish Overlays
If you're looking for a cost-effective and slip-resistant option, broom finish overlays are a popular choice. These overlays are applied to the concrete surface and then swept with a broom to create a textured finish. Broom finish overlays are commonly used for driveways, sidewalks, and other areas where traction is essential.
Polished Concrete
For a sleek and sophisticated look, polished concrete is an excellent option. This process involves mechanically grinding the concrete surface to achieve a smooth and glossy finish.
Polished concrete is not only visually appealing but also highly durable and easy to maintain. It's a popular choice for commercial spaces, retail stores, and modern residential interiors.
Colored Concrete
If you want to add color to your concrete surface right from the start, colored concrete is the way to go. Pigments are added to the concrete mix during the pouring process, ensuring that the color is integrated throughout the entire slab. Colored concrete offers long-lasting and fade-resistant hues, allowing you to create vibrant and eye-catching surfaces.
Onfloor: Your Concrete Resurfacing Solution
Now that you have a better understanding of the various concrete resurfacing options, it's time to choose the best one for your project. At Onfloor, we offer a wide range of concrete resurfacing solutions to meet your specific needs.
With our expertise and quality products, we are here to help you transform your concrete surfaces into stunning and functional spaces.
Why Choose Onfloor?
- Unmatched Expertise: With years of experience in the industry, Onfloor has become a trusted name in the field of concrete resurfacing. Our team of experts understands the nuances of different resurfacing options and can guide you in making the right choice for your project.
- High-Quality Products: We pride ourselves on offering top-quality products that deliver outstanding results. From advanced overlay systems to durable coatings, our products are designed to withstand the test of time and provide exceptional performance.
Contact Us Today!
Ready to revamp your concrete surfaces? Don't hesitate to reach out to us at Onfloor. Our team is here to answer your questions, provide expert advice, and assist you in choosing the best concrete resurfacing option for your needs. Contact us today and let us help you transform your space with our exceptional products and services.
Connect with us
Recent Posts

WANT 10% OFF YOUR FIRST ORDER?

3 comments