Many clients have pre-existing flooring covering a concrete subfloor. As the top flooring fails or becomes outdated, clients may see the value of refinishing their concrete floor underneath. However, before that can happen, they need to fully remove the existing flooring on top.
Vinyl floors can leave behind tons of glue and gunk. Some DIYers might take on the challenge to remove vinyl tile from concrete, or they may call you to do that before you restore their flooring. Either way, you need a clean slate to get started, and removing vinyl floor tiles is the first step.
Not sure how to start? We've got you covered. Here's a step by step look at how to remove vinyl tile.

First, Assess the Current Situation
Even years after installation, vinyl tile can stick to concrete with a vengeance. Before you dive into this sticky subject, take a look at the current vinyl tile. Start by asking your client if they know what kind of subfloor they have underneath the tile.
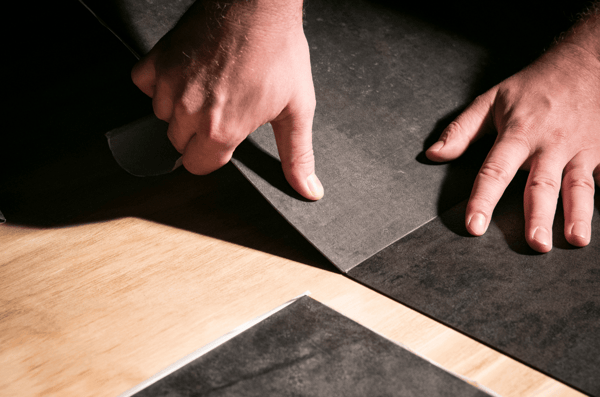
Is the vinyl flooring bubbling or pulling away from the subfloor anywhere? Usually, vinyl floor tiles will begin to move or shift over time, loosening the glue and making the flooring easier to remove. Fold up a corner or use a utility knife to cut the tile and inspect the subfloor.
Concrete subfloor is much more resistant to various removal processes, while wood floors can be more challenging. Knowing the subfloor type ahead of time can save you time if you aren't worried about piercing or damaging the hardwoods underneath. If the vinyl isn't pulling away from the flooring and the owner doesn't know about their subfloor, proceed with caution to maintain the integrity of the subfloor.
If the vinyl floor is already beginning to come up, you can remove vinyl tile with a scraper. However, if it's still attached, vinyl tile removal will require a few more steps.
What You Need to Remove Vinyl Tile from Concrete
There are a few tools you'll want handy if you're removing vinyl floor tiles.
To get started, you'll need a utility knife and long-handled scraper. Once you have these tools, ensure that you have access to hot water in the home. As always, it's highly recommended to wear protective clothing for any flooring project.
Some guides may recommend using chemicals to remove tiles and glue. While you can use chemicals on concrete flooring, we recommend not taking the chance. Many glue removers produce toxic fumes, so they often aren't worth the trouble if the flooring can be removed without them.
Instead, use a concrete floor grinder to get rid of the glue when you refinish your concrete floors underneath.


How to Remove Vinyl Tile
There are a few easy steps to help make vinyl tile removal easy. Removing tile without chemicals can be more time-consuming, but completing the job right and keeping everyone in the area safe is paramount. Before you begin, complete an asbestos test to ensure that the glue underneath or the tiles themselves aren't dangerous.
Once you've cleared the furniture from the room, it may be clearer where the vinyl is pulling away from the floor. You can start in a corner to make the job easier. This strategy works for both DIYers and experiencing flooring experts for vinal tile removal.
Cut the Tiles
Slicing a slit into the tile's surface is the first step to removing your tile. There's no need to cut through the tile; simply score the middle of each tile. This will make it easier to heat the glue beneath the tile for removal.
Cutting large tile into 4 or 6-inch sections can make removal easier. You'll be able to insert your scraper into these slits to pull up the vinyl tile with ease once the glue's been heated. Cutting the tiles make it easier to pull up the tiles immediately, before you've heated the glue underneath.
Pour Hot Water over the Vinyl Tile
If you've made your cuts and still can't pull up the tile, a little hot water may do the trick. Carefully pour a small amount of boiling water over the entire tile, including the slit. Leave the water on the tile for 30 minutes to an hour to let it soften the adhesive.
Try to remove the tile after 10 minutes. If the water still hasn't sufficiently loosened the tile, you can use a combination of warm water and dish soap to try to pry the glue loose. Rather than pulling at the tiles and leaving glue behind on the floor, try to loosen the glue as much as possible so the tile comes away from the floor with ease.
Protect yourself from burns by wearing protective clothing, gloves, boots, and eyewear before applying the boiling water.
If you'd prefer not to use water, you can use a hair dryer or iron to heat the adhesive beneath the tile. Do not lay the iron on the tile itself; instead, hold the iron or hair dryer two or three inches away from the floor to slowly heat the glue.
Some guides recommend using dry ice to pull the tiles away from the subfloor. This can damage the subfloor and potentially injure you if not handled with extreme caution. We strongly recommend using water or another heat source rather than dry ice.
Scrape the tiles up
Once the water has set in and softened the glue, the tiles should be simple to remove. Use your long-handled scraper to gently pry the tile away from the floor. Pushing the scraper beneath the tile and using it as a lever to lift the vinyl tile prevents you from scratching the floor underneath before you polish it.
Get as much adhesive on the tile as possible with each pull. While you can remove the glue from your concrete floor after the fact, clean up is much easier if you pull the glue away when it's already warm and softened. Do your best to remove the adhesive with the tile rather than only pulling the tile up, even if it takes a little more muscle from the get-go.

You're Ready to Refinish Your Floors!
Once the tiles are up, cleaning up the remaining glue can be done during the concrete refinishing process using a grinder or other mastic or glue removal tools. Now that you know how to remove vinyl tile from concrete, you have a clean slate to start from!
Ready to prep your floor for a grind and seal process or restaining? Contact us today to get all the tools you need to refinish your concrete flooring!

3 comments