For any type of flooring project, you need the right abrasive to properly prepare concrete and other flooring materials.
Let’s go through the different reasons you’d need to use an abrasive tool, and how you can choose the right grit and tool for your needs.
1. Removing concrete coating
You want to stain or seal your concrete on fresh or updated flooring. Before you do, though, you need to prepare the concrete. It needs to be ground down to its natural state to fully absorb sealant materials or chemically interact with staining solutions.
The first step in concrete preparation is removing any existing coatings. There might be coating on your concrete if it was previously sealed or if it was a subfloor underneath another flooring, like carpet or tile.
Concrete is a common material found under other flooring. This means you can remove the top flooring, get rid of any glues, and prepare the concrete to be shown as the primary flooring. We love the look of enhanced concrete —especially for basements and garages.
You could run into a number of sealants or glues that you’ll need to remove, including epoxy, acrylic, and mastic. Each has its own density and calls for a unique type of abrasive.
NOTE: When we talk about “grit,” we generally mean the particle size of the diamond or particle in the abrasive. The higher the grit, the smaller the particle size, which creates a less aggressive sanding. Learn other flooring terms here.

Diamond abrasives are best for the removal of concrete coatings. These have an aggressive profile, meaning they easily and efficiently cut into the first layer of flooring.
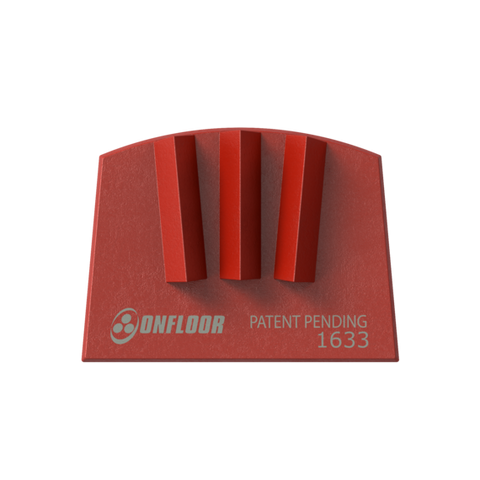
To remove epoxy, we recommend a 16-grit diamond tool. Our Onfloor 16-grit Quick Tool has a sharp, tapered edge. This helps cut through the durable grain of epoxy and aggressively profile the concrete underneath. This also works well for urethane coatings and concrete fillers.
To remove acrylic and prepare the concrete fast, a 25-grit diamond cobalt tool does the trick. This tool contains aslightly smaller grit than a 16-grit, so it works well for removing lighter acrylic sealers and polyaspartic. It can also be used on thicker films of urethane and epoxy.
For a general remove of mastic and glues, we recommend the Onfloor 25 Grit Quick Tool Riptip 3 Diamond. This can remove just about any type of adhesive or coating from your concrete floor. In the process, it helps prepare the concrete surface for staining or dying. This simplifies the preparation process for a faster and more efficient project.
Learn more about prepping your concrete floor here.
2. Grinding concrete
I have some good news for you. Almost any of the Onfloor abrasives can also be used to grind your concrete!
When grinding concrete floors, you’ll first choose the grinder that’s most appropriate for your flooring project. A flooring company like Onfloor will usually offer a recommended abrasive that fits best with that specific grinder.
The abrasive you use will typically depend on the exposure level and scratch pattern you want. Learn more about choosing the right grinder for your concrete floors here.

3. Polishing concrete
Polishing concrete is similar to grinding it. However, polishing requires more steps and the purpose is to refine the scratch pattern multiple times to create a shiny, smooth appearance.
You’ll need to use a variety of abrasives to get the polished look. You’ll want to start with a coarser-grit abrasive and move to a finer-grit.
Polishing concrete can be a challenge for DIYers because it has a number of progressive steps. Contact Onfloor now for a grinding and polishing consultation for your floors!
4. Removing wood coating
Removing wood coating is similar to removing concrete coating from #1 on this list. However, it’s important to remember that wood is a much softer surface than concrete. This means that you’ll want to use a lower grit with a slower speed grinder or sander.
Most wood sealers are polyurethane (urethane). They can leave a nasty, dark residue that can damage your hardwood floors if not properly removed. The trick here is to use the right tool with the right machine.
Thus, we always recommend removing sealers from wood with our Diamabrush Wood tool and then following up with sandpaper. The Diamabrush Wood tool will remove the urethane without gumming up and completely expose the wood.The sandpaper will work effortlessly after the removal tool has paved the way.
Bonus DIY Tip! Removing wood sealers
- Saturate an old towel or rag in warm or hot water. You can use lukewarm water and heat it in the microwave.
- Lay the towel on the floor for twenty to thirty minutes.
- The warm water will soften water-based adhesives, making it easier to remove.
- If you have a tar-based adhesive, you can try pouring laundry detergent on the wood. This will help dissolve the mastic so it’s easier to scrape up.
- You can then use a handheld scraper or sandpaper to gently remove the mastic.

5. Sanding wood
You’ll use an abrasive for sanding wood as well. You’ll want to start with a lower grit (50-grit/80-grit). If the finer grit is too light for proper sanding, you can work your way up to a more intense grit level.
We recommend starting with 50 or 80 grit sandpaper to gently sand your wood. The Onfloor 50 grit hook & loop is perfect for hardwood and deck sanding.
Learn more about wood floor restoration here.
Conclusion
Abrasives can do everything from removing glues to prepping concrete to finishing and sanding wood. But different materials require different grits of abrasives.
Not sure which type of abrasive is right for your flooring?
Don’t take the chance with the wrong abrasive.
Contact Onfloor right now for a consultation about grinding, sanding, and polishing your floors!

1 Comment