On an OnFloor OF16S EZV Sander, grommets are an internal piece that holds the sander pad in place. These little pieces can wear off in time. These grommets may also tear itself apart when your OnFloor OF16S are used on tough conditions. Once the grommets are damaged, the sander pad may fall off and once this happens, you will need to replace the worn off grommets. This article will walk you through on how to easily replace the grommets on an OnFloor OF16S EZV Sander Pad. If you also need to know how to remove a grommet type sander pad, you can also check this article.
Needed Tools
Claw Hammer and #2 Phillips Screw Driver
The screwdriver or the drill will help you in removing and installing the screws. The claw hammer or the large screw driver will help you in pulling out the sander pad.

Rubber Mallet, Safety GOGGLES and Replacement Grommets


REPLACE GROMMETS ON AN ONFLOOR OF16S EZV SANDER PAD/
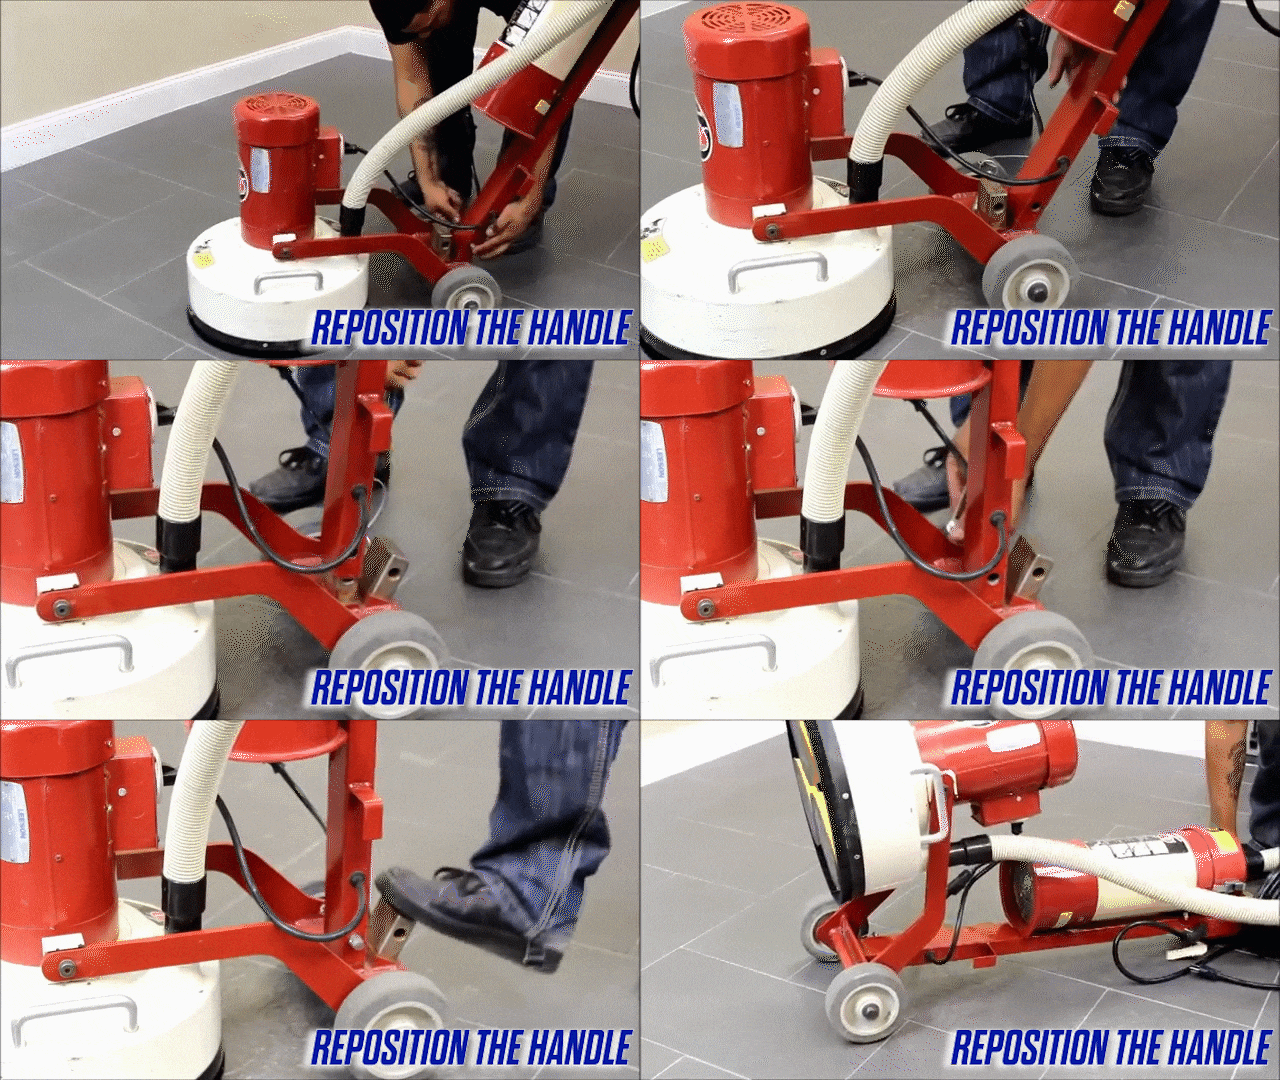
Reposition the handle
Before we start, please make sure the machine is not plugged into the power source. Utilize the lockout tagout procedure, and refer to the EZV manual.
To begin working, pull the pinout of the handle, reposition the handle to the upright position, reinstall the pin, and then lay the machine back and rest it on the floor.
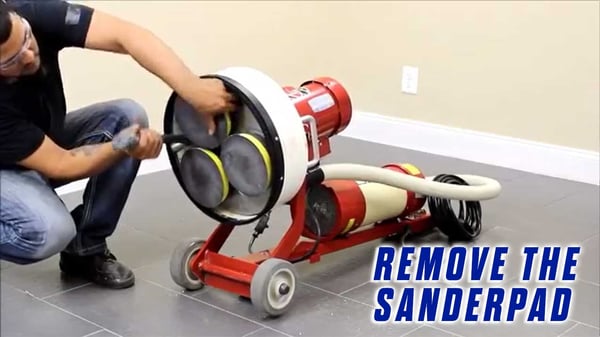
Remove the Sander Pad
Use the screwdriver or claw hammer to loosen the sander pads and remove them.
For instructions on removing a grommet style sander pads, you can check this article.
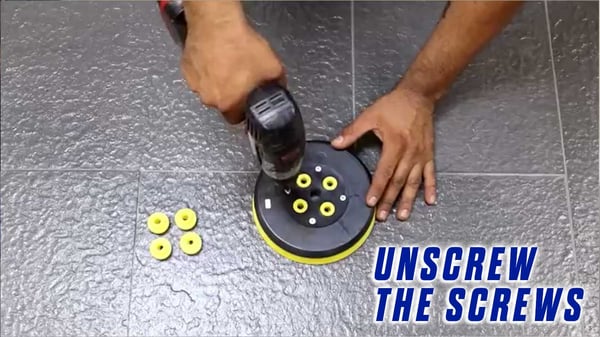
Unscrew the screws
After you've removed the pad, turn it over and unscrew all four screws on the top of the pad.
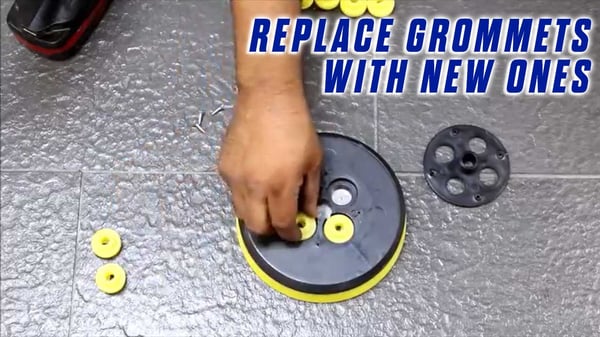
Replace with new grommets
Then remove the black plastic retainer ring. Now, lift out the old grommets and replace with the new ones.
ReInstall Retainer Ring
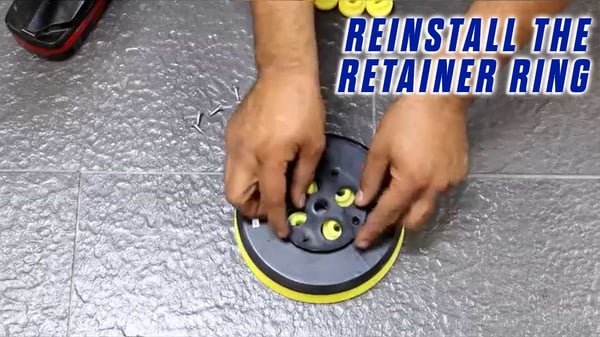
Replace the plastic retainer ring, and tighten all four screws.
Reinstall the Sander Pads
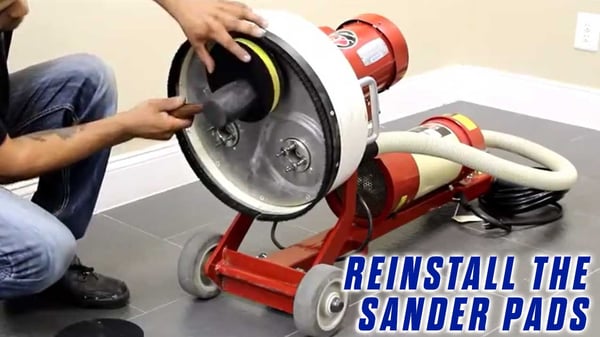
Now, you're ready to put your tools back on the sander by placing the grommets over the pegs and gently tapping down with the rubber mallet.
You're all set and ready to go!
If you feel that there is something wrong with your equipment and you can't follow through the steps, you can always contact Onfloor so we can help you out.
Now that you know how to replace the grommets of your OnFloor OF16S EZV Sander Pad, you can also check our article about maintaining a dustless job-site while grinding - When polishing a concrete floor or sanding a deck, it's important to try to minimize the dust, especially when the area being polished or grinded has people in it. You can also check our online store and compare products and find what suits you best.
YOU CAN ALSO CHECK THE FULL VIDEO OF THE TUTORIAL HERE:
Transcription - How to Replace Grommets on an Onfloor OF16S EZV Sander Pad
This instructional video will show you how to replace pad grommets on an EZV sander.
For this procedure, you will need a claw hammer or a large screwdriver, a rubber mallet, a number two Phillips screwdriver, and replacement grommets.
Before we start, please make sure the machine is not plugged into the power source. Utilize the lockout tagout procedure, and refer to the EZV manual.
To begin working, pull the pinout of the handle, reposition the handle to the upright position, reinstall the pin, and then lay the machine back and rest it on the floor.
Use the screwdriver or claw hammer to loosen the sander pads and remove.
Instructions for removing sander pads are also included in the 'replacing sander pad' section of these videos if needed.
After you've removed the pad, turn it over and unscrew all four screws on the top of the pad.
Then remove the black plastic retainer ring. Now, lift out the old grommets and replace with the new ones.
Replace the plastic retainer ring, and tighten all four screws.
Now, you're ready to put your tools back on the sander by placing the grommets over the pegs and gently tapping down with the rubber mallet.

0 comments