

Have you been in an annoying situation where the brush strips just fell off? These brush strips can fall off when the rivets are damaged. The brush strip prevents dust and leaves from entering the sander dome. Once this happens you will risk your sander pads getting damaged or your grommets being worn out because of the dust. This article will walk you through how to replace the brush strips on an OnFloor OF16S EZV Sander.
Needed Tools
Drill Bit & Claw Hammer

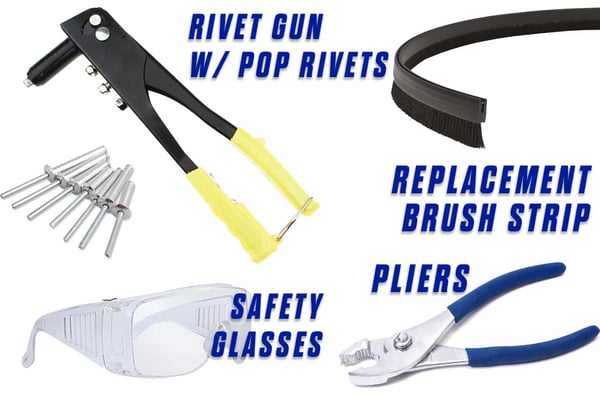
Rivet Gun, Pliers, Safety Glasses & Replacement Brush Strip

Replace the Brush Strip on an Onfloor OF16S EZV Sander
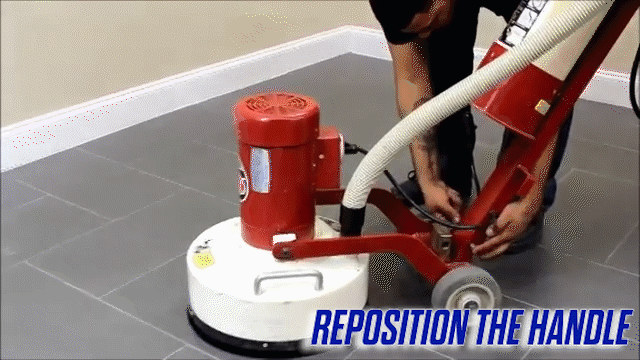
Reposition the handle
Before we start, please make sure the machine is not plugged into the power source, utilize the lockout tag out procedure, and refer to the EZV manual.
To begin working, pull the pinout of the handle, reposition the handle to the upright position, reinstall the pin, and then lay the machine back and rest it on the floor.
It's important that you wear safety glasses while performing this procedure.
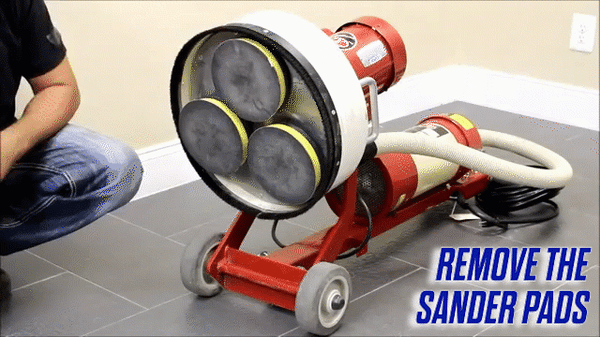
Remove the sander pads
Use the screwdriver or claw hammer to loosen the sander pads and remove them. You can also check our article in removing a grommet type or a bolt-on sander pad for more detailed instructions.
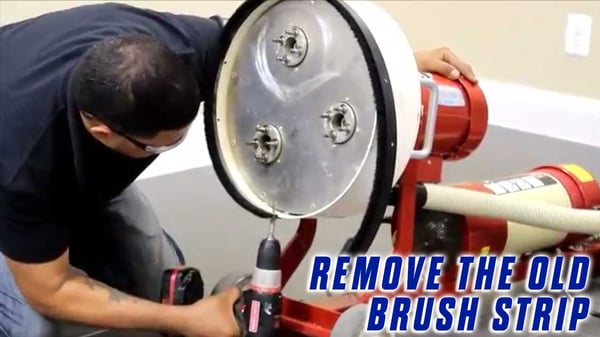
Remove the old brush strip
Using the drill with a 1/8" drill bit, insert the drill right into the hole on the pop rivet and drill right through until the rivet falls out. Do this to the remaining rivets, holding the strip to the bowl.
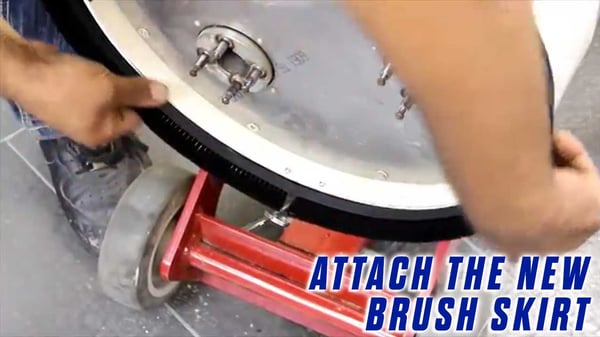
Attach the new brush strip
When you're done with this step, pre-drill the first and last holes onto the new brush skirt by using the old skirt as a guide for the new hole placement. Now attach the new brush skirt's beginning and end to the bowl with the rivet gun through these new holes.
Attach the end of the new brush strip to the bowl with the rivet gun. Now pull the skirt around to place the other pre-drilled hole over the hole in the bowl where the two ends meet.
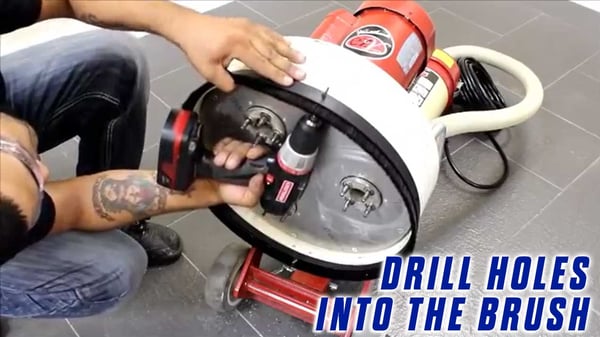
Drill the holes into the new brush strip
Now connect the brush where the two ends meet and put in the second rivet. Once that's attached, pull back on the brush strip around the bowl to make sure it's tight and even.
Now, while holding the brush strip secure, use the existing holes in the middle bowl as guides to drill holes for your remaining rivets to go into.
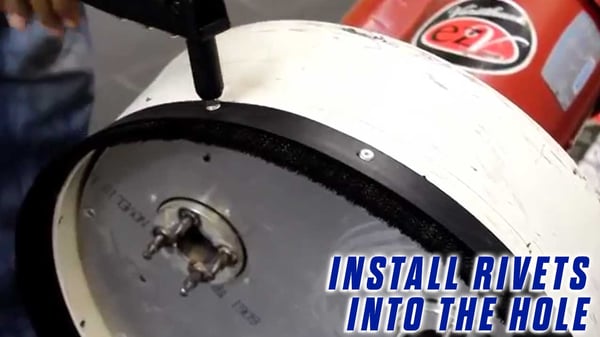
Once you're finished drilling your holes, go around and check that the brush strip is completely straight.
Install rivets into the hole
Now install all the remaining rivets into the holes. Hold the brush strip tightly in place as you secure them.
Now that your brush strip is secure, it's time to put your tools back on.
If you need assistance with getting pads back on, please check out our other article on replacing pads.
If you feel that there is something wrong with your equipment and you can't follow through the steps, you can always contact Onfloor so we can help you out.
Now that you know how to replace the brush strips of your OnFloor OF16S EZV Sander Pad, you can also check our article about maintaining a dustless job-site while grinding - When polishing a concrete floor or sanding a deck, it's important to try to minimize the dust, especially when the area being polished or grinded has people in it. You can also check our online store and compare products and find what suits you best.
YOU CAN ALSO CHECK THE FULL VIDEO OF THE TUTORIAL HERE:
Transcription - How to Replace the Brush Strip on an Onfloor OF16S EZV Sander
This instructional video will show you how to replace a brush strip on an EZV Sander.
Tools you'll need for this are a claw hammer or large screwdriver, an electric drill with a 1/8" bit, pliers, safety glasses, a replacement brush strip, and a rivet gun with pop rivets.
Before we start, please make sure the machine is not plugged into the power source, utilize the lockout tagout procedure, and refer to the EZV manual.
To begin working, pull the pinout of the handle, reposition the handle to the upright position, reinstall the pin, and then lay the machine back and rest it on the floor.
It's important that you wear safety glasses while performing this procedure.
Use the screwdriver or claw hammer to loosen the sander pads and remove them.
Instructions for removing sander pads are also included in the Replacing Sander Pads section of these videos if needed.
Using the drill with a 1/8" drill bit, insert the drill right into the hole on the pop rivet and drill right through until the rivet falls out. Do this to the remaining rivets, holding the strip to the bowl.
When you're done with this step, pre-drill the first and last holes onto the new brush skirt by using the old skirt as a guide for the new hole placement.
Now attach the new brush skirt's beginning and end to the bowl with the rivet gun through these new holes.
Here we are attaching the end of the new brush strip to the bowl with the rivet gun.
Now pull the skirt around to place the other pre-drilled hole over the hole in the bowl where the two ends meet.
Now connect the brush where the two ends meet and put in the second rivet. Once that's attached, pull back on the brush strip around the bowl to make sure it's tight and even.
Now, while holding the brush strip secure, use the existing holes in the middle bowl as guides to drill holes for your remaining rivets to go into.
Once you're finished drilling your holes, go around and check that the brush strip is completely straight.
Now install all the remaining rivets into the holes. Hold the brush strip tightly in place as you secure them.
Now that your brush strip is secure, it's time to put your tools back on.
Thanks for watching. If you need assistance with getting pads back on, please check out our other videos on replacing pads.

Connect with us
Recent Posts

WANT 10% OFF YOUR FIRST ORDER?

0 comments