

If it comes a time that your power cord is damage or is risky for short circuit, then you need to replace it. It may be due to a rodent or simply an accidental cut on the cord. Do not risk this machine running while there is a cut or an open wound on your power cord. This article will show you how to replace a power cable on an OnFloor OF16S EZV Sander. You can choose between 2 methods depending on the structure of your wiring.
needed tools
NUT DRIVER OR SOCKET WRENCH 9/16" AND 3/8" AND FLAT AND PHILLIPS SCREWDRIVER
These tools are needed to remove and tighten bolts and screws.

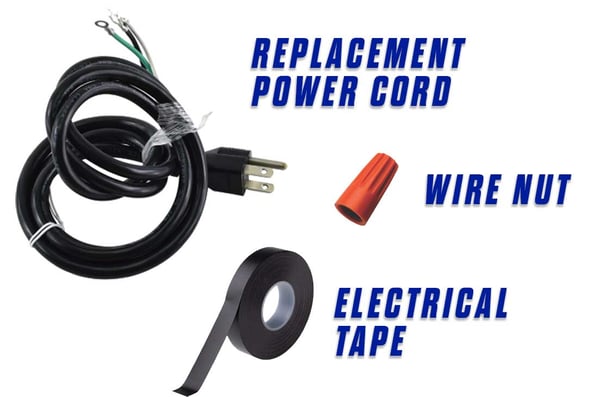
Replacement Cord, Wire Nut and Electrical Tape

REPLACE THE POWER CORD ON AN ONFLOOR OF16S EZV SANDER
The power cord may be wired multiple ways. We are going to show you how to replace the power cord for two possible wiring methods.
Do not attempt to service your machine if the wiring on your sander differs from the two ways we are demonstrating in this video.
Warning, the power cord should not be used with an additional extension cord. Before we start, please make sure the machine is not plugged into the power source. Utilize the lockout tagout procedure and refer to the EZV manual.
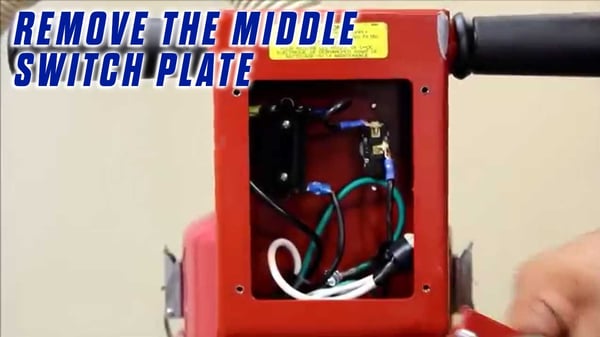
remove the middle switch plate
Start by removing the middle switch plate on the back of the sander handle using the number two Phillips head screwdriver, or a drill with a number two screw head.
Wiring method 1
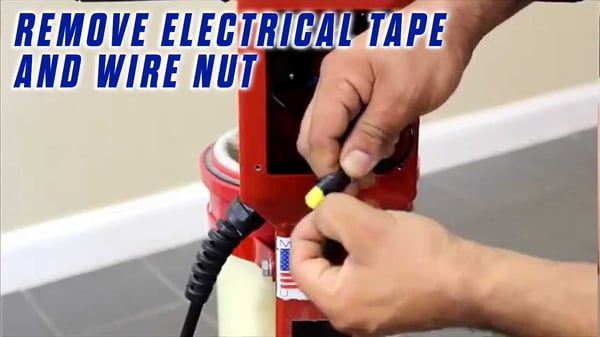
remove electrical tape and wire nut
Remove the electrical tape and the wire nut from the three white lead wires and separate them.
remove lock nuts
Use the 3/8th of an inch nut driver or wrench to remove the lock nuts that secure the three green ground wires to the handle. You may need to use a Phillips head screwdriver to secure the bolt on the front of the handle.
There will be two nuts to remove between the three green ground wires. Be sure to hold on to them for later.
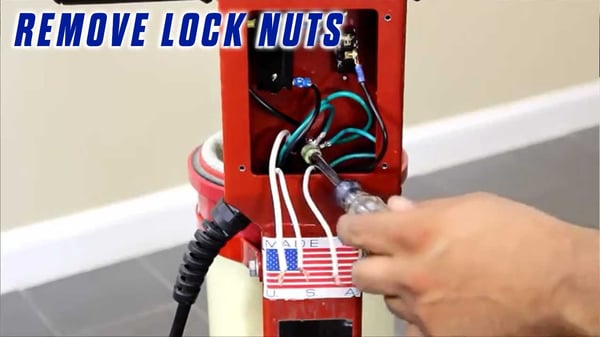
Now, you should see three white lead wires and three green ground wires.
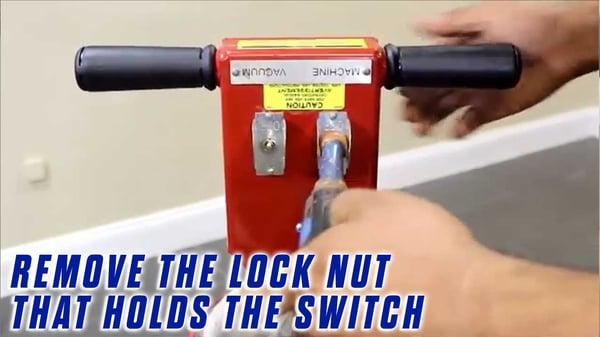
Remove the lock nut that holds the switch
Next, go to the front of the machine's handle, use the 9/16th inch nut driver or deep socket wrench to remove the lock nut that holds the switch onto the handle.
remove switch from handle
Go to the backside of the handle again and remove this switch from the handle. Take care not to lose the plastic white spacer attached to the switch.

Disconnect power cord from toggle switch
The power cord wire is a black wire with a yellow terminal. Disconnect the power cord wire from the sander toggle switch.

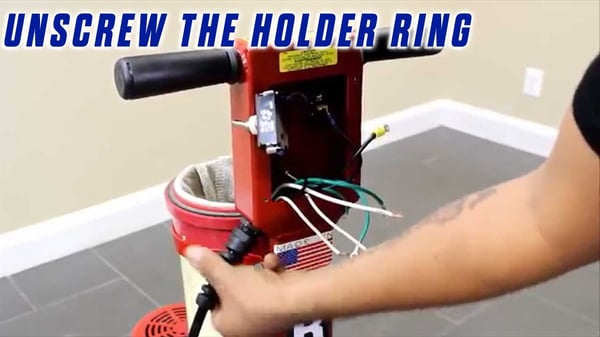
unscrew the holder ring
Unscrew the holder ring from the power cord and pull the power cord up enough to remove the rubber cord grommet and any electrical tape. Take care not to lose this rubber grommet as you will need it for the new cord.
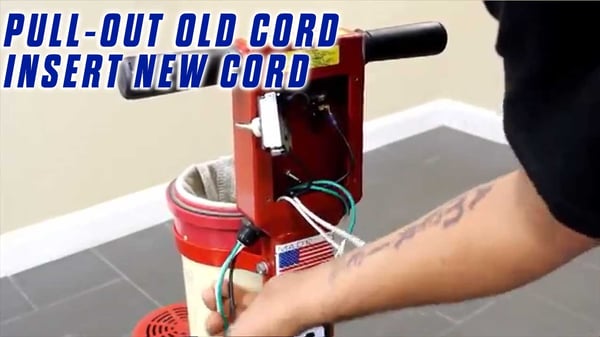
pull-out old cord and insert new cord
Now, pull the cord completely out of the handle. Insert the new power cord wires in through the handle and pull the cord up to create some extra slack.
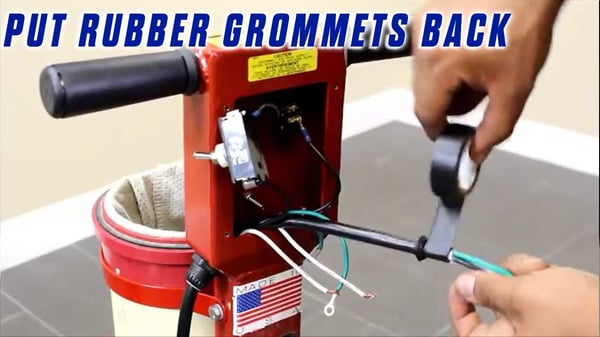
put rubber grommet back
Put the rubber grommet back on over the wires and onto the power cord. Add electrical tape to hold in place.
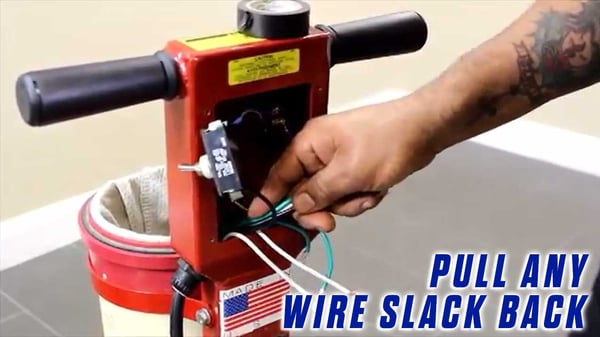
pull wire slack back
Pull any wire slack back through the handle hole and tighten the plastic cord ring.
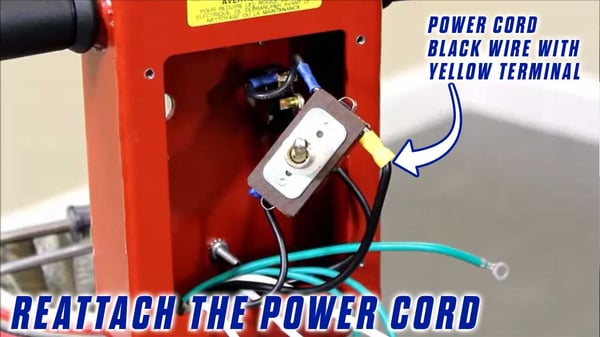
Reattach the power cord
Reattach the power cord wire back onto the switch. Again, that's the black wire with the yellow terminal. Please note that as you are connecting the wire, the switch should be upside down with the off position at the top.
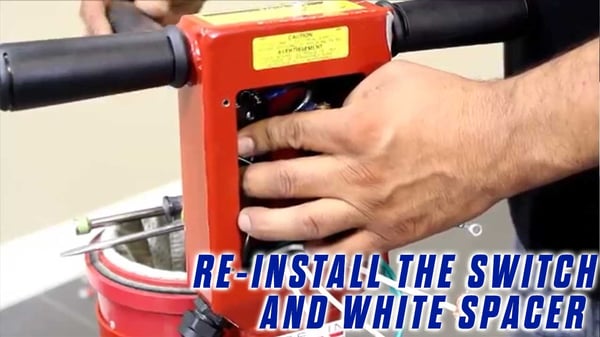
Re-install the switch and white spacer
Re-install the switch and white spacer to the handle using the 9/16th inch nut driver or wrench to reattach the lock nut that holds the switch onto the front of the sander handle.
cap 3 white wire with wire nut
Twist the ends of the three white lead wires together and cap them with a wire nut. Then secure this with electrical tape.

reattach 3 green ground wires
Now, reattach the three green ground wires, securing them with the lock nuts that were removed earlier.
wiring method 2
As mentioned earlier in this article, there are two possible ways that your machine could be wired. Here's wiring method two. This is the second most commonly used method of wiring.
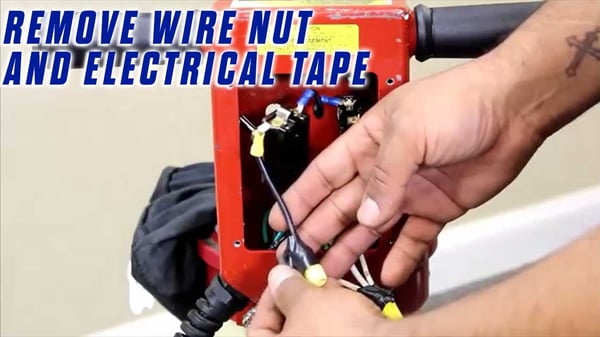
remove wire nut and electrical tape
If you see a small black jumper wire connected to the switch, remove this wire nut and electrical tape.
disconnect wire from switch
Then you will disconnect this wire from the switch and discard it.
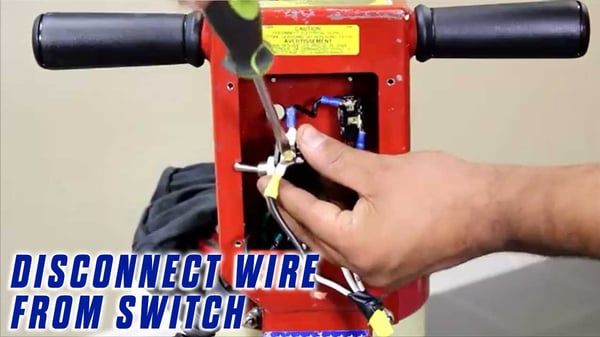
Now, just connect the new power cord directly to the switch as shown in method one.
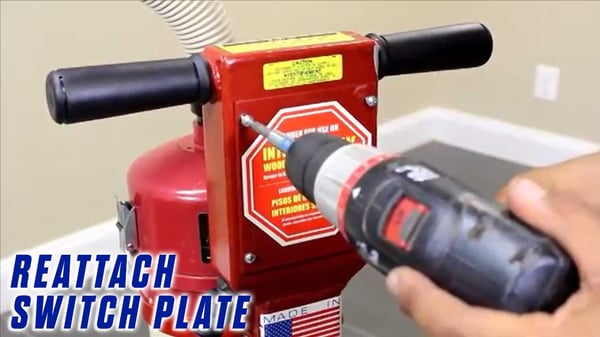
reattach switch plate
Now, you can replace the middle switch plate cover and reattach it with the hardware back onto the sander's handle.
Now that you're done, be sure to test that the toggle switches work properly and that they match their labeled functions.
If you feel that there is something wrong with your equipment and you can't follow through the steps, you can always contact Onfloor so we can help you out.
Now that you know how to replace the power cord of your OnFloor OF16S EZV Vacuum Sander, you can also check our article about Decorative Concrete Overlays if you’re looking to update and refresh the look of your concrete floors. You can also check our online store and compare products and find what suits you best.
YOU CAN ALSO CHECK THE FULL VIDEO OF THE TUTORIAL HERE:
TRANSCRIPTION - How to Replace the Power Cord on an Onfloor OF16S EZV Sander
This instructional video will show you how to replace a power cord on an EZV sander.
The tools you'll need for this procedure are a flat and Phillips head screwdrivers, electrical tape, nut driver, or socket wrenches in 9/16th inch and 3/8th inch, a wire nut and a replacement power cord.
The power cord may be wired multiple ways. We are going to show you how to replace the power cord for two possible wiring methods.
The first method is the most commonly used. Do not attempt to service your machine if the wiring on your sander differs from the two ways we are demonstrating in this video.
Warning, the power cord should not be used with an additional extension cord. Before we start, please make sure the machine is not plugged into the power source. Utilize the lockout tagout procedure and refer to the EZV manual.
Start by removing the middle switch plate on the back of the sander handle using the number two Phillips head screwdriver, or a drill with a number two screw head.
Wiring method, number one.
Remove the electrical tape and the wire nut from the three white lead wires and separate them.
Use the 3/8th of an inch nut driver or wrench to remove the lock nuts that secure the three green ground wires to the handle. You may need to use a Phillips head screwdriver to secure the bolt on the front of the handle.
There will be two nuts to remove between the three green ground wires. Be sure to hold on to them for later.
Now, you should see three white lead wires and three green ground wires.
Next, go to the front of the machine's handle, use the 9/16th inch nut driver or deep socket wrench to remove the lock nut that holds the switch onto the handle.
Go to the backside of the handle again and remove this switch from the handle. Take care not to lose the plastic white spacer attached to the switch.
The power cord wire is a black wire with a yellow terminal. Disconnect the power cord wire from the sander toggle switch.
Unscrew the holder ring from the power cord and pull the power cord up enough to remove the rubber cord grommet and any electrical tape. Take care not to lose this rubber grommet as you will need it for the new cord.
Now, pull the cord completely out of the handle. Insert the new power cord wires in through the handle and pull the cord up to create some extra slack.
Put the rubber grommet back on over the wires and onto the power cord. Add electrical tape to hold in place. Then pull any wire slack back through the handle hole and tighten the plastic cord ring.
Reattach the power cord wire back onto the switch. Again, that's the black wire with the yellow terminal. Please note that as you are connecting the wire, the switch should be upside down with the off position at the top.
Re-install the switch and white spacer to the handle using the 9/16th inch nut driver or wrench to reattach the lock nut that holds the switch onto the front of the sander handle.
Twist the ends of the three white lead wires together and cap them with a wire nut. Then secure this with electrical tape.
Now, reattach the three green ground wires, securing them with the lock nuts that were removed earlier.
As mentioned earlier in this video, there are two possible ways that your machine could be wired. Here's wiring method two. This is the second most commonly used method of wiring.
If you see a small black jumper wire connected to the switch, remove this wire nut and electrical tape.
Then you will disconnect this wire from the switch and discard it.
Now, just connect the new power cord directly to the switch as shown in method one.
Now, you can replace the middle switch plate cover and reattach it with the hardware back onto the sander's handle.
Now that you're done, be sure to test that the toggle switches work properly and that they match their labeled functions.

Connect with us
Recent Posts

WANT 10% OFF YOUR FIRST ORDER?

0 comments