

Any electronic has it's own lifetime and when it comes a time that your OF16S EZV Vacuum Sander won't turn on and you already have checked the motor and the vacuum then the switch must be replaced. If you have doubts or unsure where the problem is, you can check our previous article about troubleshooting the toggle switches and the motor on an OnFloor OF16S EZV Vacuum Sander.
Needed Tools
Flat and Phillips head screwdriver
To be used in removing the switch plate and in installing the new switch.

Nut Driver or Socket Wrench 9/16
To be used in removing the locknut.

Replacement Switches
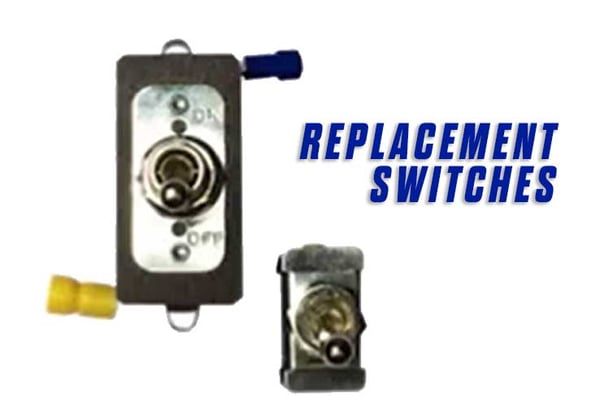

REPLACE TOGGLE SWITCHES
Please be sure that the power cord is unplugged before servicing.
Before we start, please make sure the machine is not plugged into the power source. Utilize the lockout tagout procedure, and refer to the EZV manual.
Remove the Metal Switch Plate
Remove the metal switch plate on the back of the sander handle using the #2 Phillips screwdriver or drill. There are 4 screws holding it.

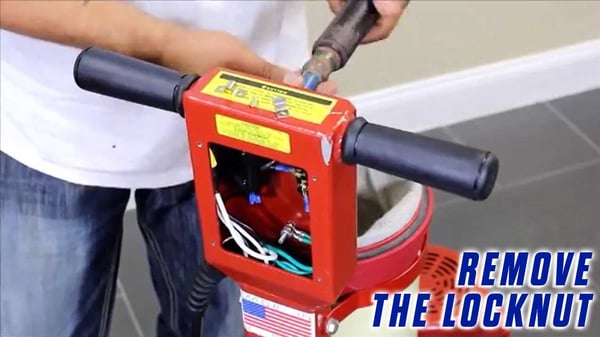
Remove the Locknut
Use the 9/16" nut driver or deep socket wrench to remove the locknut that holds the broken switch to the front of the sander handle. Take care not to lose the locknut or the plastic spacer, as these will be used with the new switch.
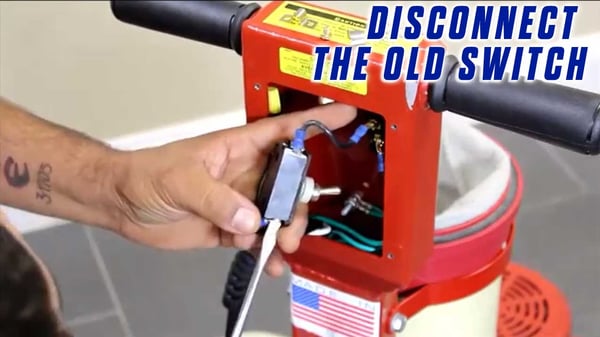
Disconnect the old switch
Disconnect the bottom wire from the old switch using the flat-head screwdriver. Make sure to keep that metal jumper, as you will need to use that with the new switch.
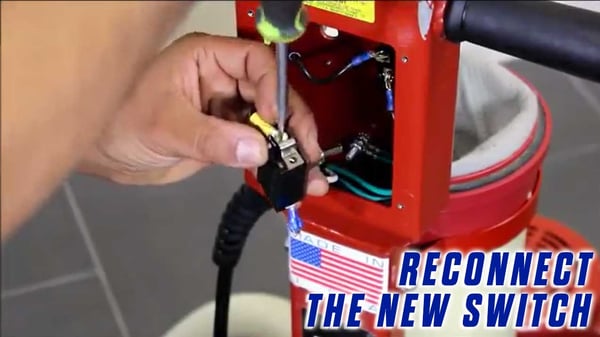
Install the new switch
Now, reconnect the free wire to the corresponding lead on the new replacement switch. Use the metal jumper taken from the old switch. Please note that the switch itself is supposed to be upside down with the 'off' position at the top. Repeat this action with the remaining top wires, also using the metal jumper from the top of the bad switch.
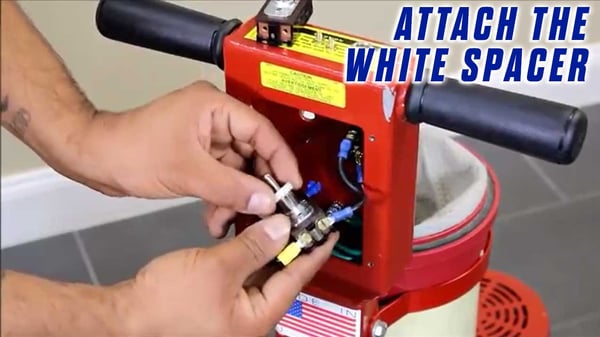
Attach the white spacer
Now, place the white spacer you saved from the old switch onto the new one, and install this new switch into the sander handle.
PUT THE LOCKNUT BACK
Put the locknut back on in the front of the handle, and tighten to fasten the switch.

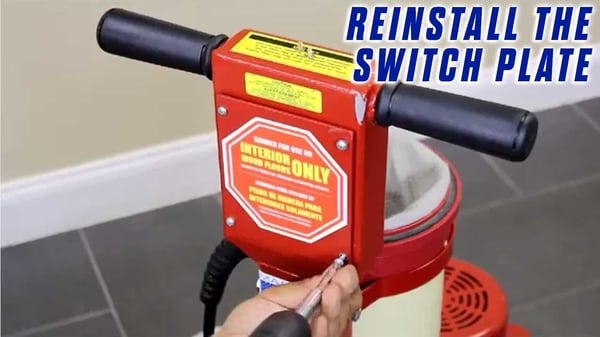
Reinstall the switch plate
Now, you can replace the metal switch plate. Reinstall all four #2 screws and tighten.
Now that you're done, be sure to test that the toggle switches work properly, and that they match their labeled functions.
If you feel that there is something wrong with your equipment and you can't follow through the steps, you can always contact Onfloor so we can help you out.
Now that you know how to replace the toggle switch of your OnFloor OF16S EZV Vacuum Sander, you can also check our article about Decorative Concrete Overlays if you’re looking to update and refresh the look of your concrete floors. You can also check our online store and compare products and find what suits you best.
YOU CAN ALSO CHECK THE FULL VIDEO OF THE TUTORIAL HERE:
TRANSCRIPTION - How to replace the Toggle Switches on an Onfloor OF16S EZV Sander
This video will show you how to replace toggle switches on an EZV sander.
For this procedure, you'll need flat and Phillips head screwdrivers, a 9/16" nut driver or socket wrench, and replacement vacuum and/or sander switches.
Please be sure that the power cord is unplugged before servicing.
Before we start, please make sure the machine is not plugged into the power source. Utilize the lockout tagout procedure, and refer to the EZV manual.
Remove the metal switch plate on the back of the sander handle using the #2 Phillips screwdriver or drill.
Use the 9/16" nut driver or deep socket wrench to remove the locknut that holds the broken switch to the front of the sander handle.
Take care not to lose the locknut or the plastic spacer, as these will be used with the new switch.
Disconnect the bottom wire from the old switch using the flat-head screwdriver. Make sure to keep that metal jumper, as you will need to use that with the new switch.
Now, reconnect the free wire to the corresponding lead on the new replacement switch. Use the metal jumper taken from the old switch.
Please note that the switch itself is supposed to be upside down with the 'off' position at the top.
Repeat this action with the remaining top wires, also using the metal jumper from the top of the bad switch.
Now, place the white spacer you saved from the old switch onto the new one, and install this new switch into the sander handle.
Put the locknut back on in the front of the handle, and tighten to fasten the switch.
Now, you can replace the metal switch plate. Reinstall all four #2 screws and tighten.
Now that you're done, be sure to test that the toggle switches work properly, and that they match their labeled functions.

Connect with us
Recent Posts

WANT 10% OFF YOUR FIRST ORDER?

0 comments